Monday, December 20, 2021

Christmas 2021, Gift 2: Some Pretty Throw Pillows


Man, getting gifts done this year has been a constant battle!  I spent all of Saturday, a day I really wanted to make a bunch of gifts for the family, working on getting printers set up so that the daughter and husband could make some gifts.  After rebooting networks, finding and replacing ink cartridges, getting print heads aligned and cleaned and everything else, the day was pretty much shot.  Sunday, my son hadn't slept Saturday night, so I was not functioning so well, but I managed to get basics done, like housework.  So, being super productive and getting a bunch of gifts made hasn't really happened.

Bright side, I did find time to quickly get a gift finished for the daughter in the middle of all of the chaos, although it wasn't really a hard gift to do, so let's catalog that anyway!

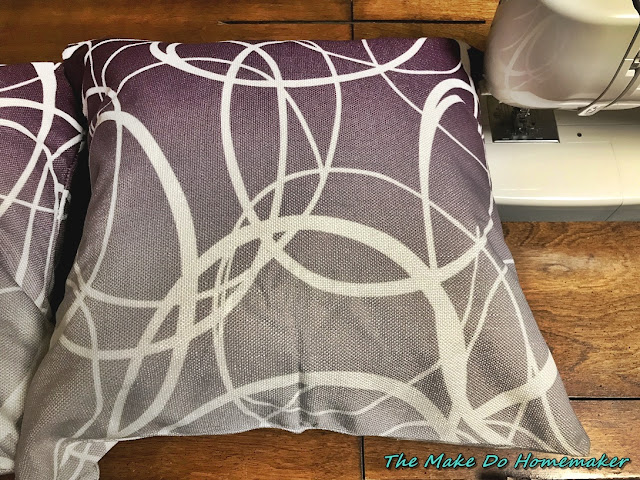
A while back, I found a good deal on a couple of pretty slip covers for cheap and they have sat in my closet for months.  One of the main things my daughter asked for Christmas early this year was some new throw pillows as the ones I made her in the past are really on their last legs (like one of the pillows I made for her the actual material is starting to develop holes...usually a good indication that the pillow is at the end of its life cycle).  I did my best to mend her current throw pillows and told her I'd aim to get her new ones for Christmas.  So, when I saw these pillow covers, I had to get them for her and make her some replacement throw pillows.  


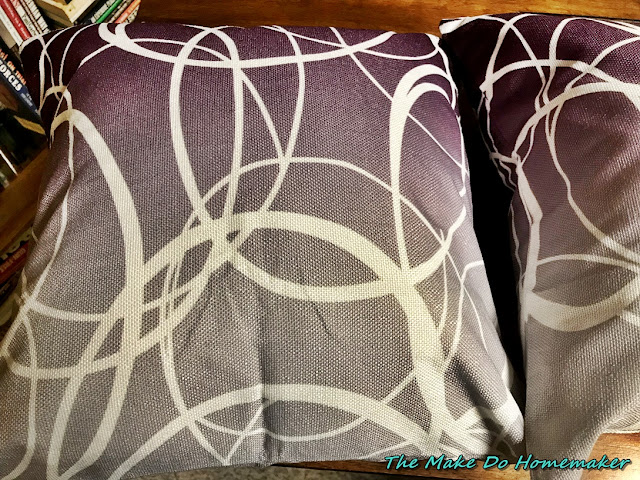
The pictures really don't do them justice.  The pillows have a pretty graduated pattern of purple to them that fade out into a really light purple grey.  It would have been better as pink (since that is the daughter's favorite color), but I was willing to settle on the color since it was so pretty.

So, I took some leftover unbleached muslin that I had from another project and some stuffing/filling I had and was able to make two pillow forms to fit the pillow covers in no time flat.  The pillow forms aren't perfect, but they are going to spend their lives stuffed into a pillow cover, so I was perfectly content with that *laugh*.  I couldn't really make the pictures pretty before taking the photos of the finished pillows, sorry to say, as I was in a tremendous hurry to stuff said pillows into a big box and get it wrapped before the daughter saw what I was doing, which was harder than I thought it was going to be.

So, two gifts down for the year.  I really don't know if I'll be able to do much more, honestly, as my husband came down with a cold last night and went down hard.  He's pretty miserable.  So, I'm not sure how much I'm going to get done in the gift department when I'm just trying to keep the son from going into my bedroom and waking my husband up.

So, two gifts down for this year.  Here's hoping I can get a few more done before the big day. 

Thursday, December 16, 2021

Making Much With Very Little: Stuffed Pepper Casserole

This is one of those recipes that was born out of necessity for me.  See, those of you who live in other climates might be able to go down and get cheap bell peppers, but in Alaska...I've never run into such a thing.  For the most part it seems like you can run into cheap peppers once in a long while, but for the most part you are looking at 1.00+ for a green bell pepper no matter the time of year up here.  So, stuffed peppers weren't really part of my budget.

So, I got a good deal on mini sweet peppers at the store one day recently and decided to try and stuff mini peppers to make stuffed peppers as the daughter wanted to try them.  Results?  Flat pepper halves that were incapable of holding any filling at all.  So, I punted.  I made a batch of stuffed pepper filling and then made the peppers work to make a casserole.  It worked well and the daughter enjoyed the new casserole.

Now, a quick note on stuffed peppers.  I remember my grandmother making stuffed peppers a bunch when I was a teenager and I once asked her why she thought someone had come up with the idea.  She smiled and talked about her mom stuffing every veggie she could think of with meats that were padded out with rice, or bread crumbs or oatmeal.  Anything to make meat stretch and give the family more filler and nutrition from the vegetables and the grains.

I have read a bunch of articles that are saying the produce is going to be going up in price due to a fertilizer shortage, so I wanted to mention a few alternatives here.  One, you can dice up the peppers like I do here and place them in the bottom of your casserole dish so you end up with a bit of a crunch to your peppers.  Or, you can use a bag of frozen onion and pepper mix and use that in with the stuffing to give you the pepper flavor, but yield you a softer pepper.  Or you could cook your peppers with your meat along with your onions if you are using fresh and yield softer peppers that way.  Sky's the limit here.  Go with what you prefer for flavor and texture.

Now, other flavor variations.  You can use diced tomatoes instead of tomato sauce in this recipe, which will yield a different texture, but I think it would yield a drier casserole, and I prefer mine to be moist, so go with what you prefer.  If you like it spicy you could add a bit of red pepper flake to the meat, or add a can of sliced chilies...there's a lot of play here and the nice part is that since you are putting in your main casserole all cooked up you can taste your mixture as much as you need to before putting it in the oven :).

So, here you go folks.  Stuffed peppers without stuffing peppers.  Stuffed pepper casserole!


Stuffed Pepper Casserole


Ingredients:

  • 1 Cup diced sweet pepper (colored or green, your choice.  I had mini sweet colored peppers so I used those).  This amount can be adjusted up if you want more pepper in your casserole :).
  • 1 cup cooked rice (great use for leftover rice)
  • 1 pound ground beef, cooked and drained
  • 1 medium onion, diced fine (I used a sweet onion)
  • 1 to 2 TBS butter or cooking oil
  • 1/4 tsp. garlic powder 
  • 1 TBS Italian herb seasoning
  • 1 tsp. salt (or more to taste)
  • 1/2 tsp. ground black pepper
  • 1/2 cup tomato sauce (or more to make a moist mixture.  This may vary depend on what type of rice you are using)
  • 1 cup shredded cheddar cheese, separated


Directions:

1.  Preheat oven to 375 degrees F.

2,  Clean, seed and dice peppers and place in bottom of an 8x8" baking dish.  Set aside.

3.  Place butter or cooking oil into a preheated skillet.  Add onion and turn heat to low.  Sweat onion until it is translucent.  Turn up heat to medium and add ground beef, garlic powder, Italian herb seasoning, salt and black pepper.  Stir constantly until mixture is heated through.

4.  Place rice into a medium sized mixing bowl.  Add beef mixture on top of it.  Mix well.  Add tomato sauce.  Stir mixture again.  Add 1/2 cup of the shredded cheese and mix one more time.  Taste and adjust flavorings or tomato sauce amounts accordingly (you want the mixture to be moist and kind of sticky).  

5.  Spoon rice and beef mixture on top of peppers in pan.  Place the other 1/2 cup of cheese on top of the mixture.  Cover and place in preheated oven.

6.  Bake 25 minutes.  Remove covering and place baking pan back in oven.  Cook an additional 10 minutes to brown up the cheese and the mixture is bubbly.


There you go folks.  Another use for ground meat.  And yes, I say meat.  I'm sure you could use ground chicken or pork and just do the flavorings to your liking.  Since you are dealing with already cooked meat, it should be pretty easy to tailor it to fit your family's individual tastes :).  Enjoy! 

Wednesday, December 15, 2021

Christmas 2021, Gift One: Home Made Lip Balm


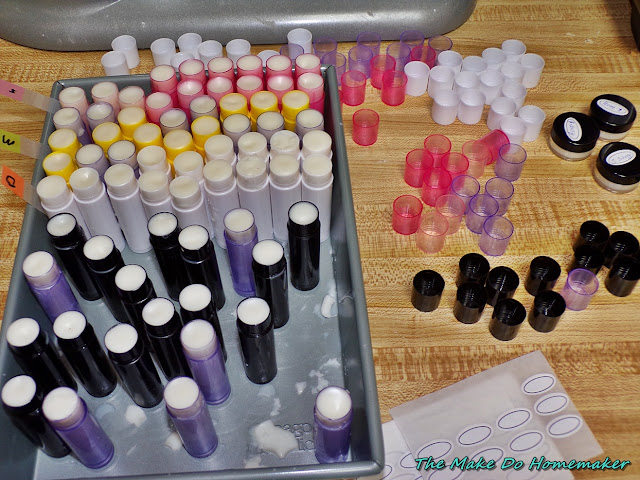
When it came to making gifts this year, I decided I would go in a different direction with a few gifts for the family.  So, this year I made lip balms/chap sticks in bulk for my husband and kids.  The main reason there are so many in the photo above is that my son has taken a liking to eating chap sticks over the last year.  I suspect it is because he won't eat...you know...food...so he craves the fat in the chap sticks as he keeps growing every time I look at him.  I've been sourcing all natural options that contain coconut oil and things basically as a sneaky way to sneak "good" fats into his diet versus goodness knows WHAT that is in the good old chemical laden ones, but MAN that gets expensive fast.  So, I decided to dust off of my "I need to make everything because my child is allergic to everything" gloves and ordered the materials to make my own lip balms in bulk for this year's Christmas gift to my family.  And, bonus, this way I'll definitely know what the son is consuming whenever he eats one as there are three ingredients, basically.

I will link to the recipe that I used and to the materials I bought.  Mind you, I went as cheap as I could to source the materials and I wanted a good volume for my buck, so this would give you enough beeswax and coconut oil to probably make lip balms for an army, so just be aware of that when you purchase.  

Note:  The following posts contains NO Associate fee links.  I'm just sharing.  If you wish to support the blog via Amazon purchases, please feel free to hit up the link on the right side of the blog and order whatever you want through the link.  Amazon will give me a small commission for pointing the sale their way if you order through that link and it will cost you nothing extra to do.  If you support the blog in this way, thank you :).

For this Christmas gift I went and purchased the following materials (over like four or five months so as not to break the bank):

  • 105 Pack of Lip Balm Tubes (Assorted Colors)
  • I also got these:  Lip Balm Containers, but man they are TINY.  I won't be buying those again, I doubt.
  • BetterBody Foods Organic Naturally Refined Coconut Oil, 56 oz (I went with refined to avoid the coconut flavor as the son gets funky about these things and my husband prefers neutral flavors in chap stick). 
  • Howemon White Beeswax Pellets, 2 lb bag (Note on this:  Some people were complaining about a chemical smell with the pellets and said they weren't true beeswax.  I didn't have any of those problems.  Mine smelled like nothing offensive and melted just like the refined beeswax pellets I've used in the past, but with shortages your mileage may vary on quality with different sellers on Amazon and things.  I wanted white because I knew my son wouldn't even let me near him with a yellow lip balm.  Anyway, use your own judgement on this product).

I used flavoring oils I already had in the house to flavor different lip balms.  I have to say, if you have a choice, go with the essential oils as they are more powerful and I think work better.  I ended up using at least 20 drops of flavoring oil per batch and the lip balms STILL barely taste like anything.  

The recipe I used to make the lip balms is Coconut Mama's Recipe and I just made a recipe with each flavor.   I found I got 16 lip balms out of each batch versus the yields she shared on her blog, but it might have been variances in materials that caused that to happen (or I'll find huge air bubbles in my lip balms when we go to use them, which would make me feel awful, but I doubt it).   I used olive oil I already had in the house for the third oil :).

Overall, I made four flavors and got a ton of lip balms to put under the tree for the family this year and also have enough materials to make a ton more, so I'd say it was worth it :).

How about you?  Making any gifts so far this holiday season?  My family is going crazy with the home made gifts this year, which I'm loving.  My daughter is making gifts for everyone in the family and some extended family too and even my husband has gotten into making gifts this year.  It is cool :).

Tuesday, December 14, 2021

Frugal Friday: Money Saving Weekly Recap (Times a lot)

First, I want to thank all those who checked in with me the last weeks to see how I was doing.  It has been a bit rough, so if you haven't heard back from me, I WILL try to get back to you and I'm sorry for the delay.

So, what has been going on?  Well, right about the time of my last blog post, I was starting to get sick.  I thought it was allergies, honestly, as the symptoms were kind of come and go like allergies.  But, it just kept going and slowly getting worse.  I had a headache for nearly a week straight, which then went into stomach upset for about a week (thankfully I was able to function while this was going on).  Somehow I held it together pretty well through Thanksgiving and then the weekend after Thanksgiving I went down hard.  I had full blown cold symptoms, lost my voice for three days straight, the whole shabang.  My husband even had to stay home from work one day because I honestly wasn't able to stay awake very well and desperately needed to lie down.  And boy did I sleep.  A lot.  After that it was just fighting horrible, and I mean HORRIBLE fatigue.  Standing up for more than a few minutes was really hard to do and I kept getting winded walking or just out of no where.  My mother-in-law was nice enough to pick me up a home COVID test because she was worried I had it.  It came up negative, so I just tell people I was down with "Not COVID" and leave it at that.  I honestly have no idea what I had, but I don't want it back again if I can help it for sure.  And to those out there who would be concerned, don't worry.  I went no where when I was sick.  Trust me, I wasn't up to going anywhere anyway.

The last week about I've finally gotten some energy and am feeling human again, so I have been working really hard to just get caught up on Christmas stuff around here.  I somehow managed to put up the Christmas tree and decorations the day after Thanksgiving, so at least I didn't have to try and do THAT while barely able to think straight when I was so sick.  But, yeah, Christmas cookie baking and decorating are definitely behind.  We managed to get the gingerbread house made and decorated, which I was happy to be able to do that with the kids, and we baked the cookies yesterday so today is making and putting on frosting and sprinkles.

So, yeah, it's been hectic now that I'm feeling better.  I have NOT forgotten about the different blog posts I have in the works, so stay tuned for that.  I also have a few gifts I'm desperately trying to get done and under the tree by Christmas, so stay tuned for that.  I'm honestly not sure if I'll get all of the gifts done this year as I'm just so far behind, but I figure I'll do what I can and forgive myself the rest.  Some years are like that. 

So, let's get to some money saving things we did the last bit.

1.  Well, this was an interesting frugal fail.  I went to the store before Thanksgiving to get regular groceries and a few last minute little things for Thanksgiving.  I knew I was going to spend enough to get a free turkey, so I figured I'd go and get next year's turkey like I always do and put it in the freezer for later.  Well, this is the sight that met me when I got to the meat section...

Now mind you this was actually a few weeks before Thanksgiving, so I was blown away when I saw that they were completely bare of turkeys.  

I found myself really, really grateful that I had a turkey in the freezer for Thanksgiving.  I feel for those who had to figure out something else maybe because they couldn't find a turkey :(.

Anyway, I knew I wasn't going to be back at the store before Thanksgiving, so as soon as I pulled out the turkey for Thanksgiving I just rearranged the freezer and decided to use the space freed up by the turkey to better store my frozen vegetables.  I decided I wasn't going to worry about not having a turkey for next Thanksgiving at this point.  I have a year.  I'll find something at some point.  And if I don't, we'll have something else next year and we'll be just fine.  Thanksgiving is being grateful for what you have and I was determined to keep that spirit this year.

2.  I took advantage of one Black Friday sale this year.  My daughter desperately needed a new winter coat as she's grown into a woman's size versus a kid's size now.  I HATE buying winter gear this time of year as you end up spending full price on it, but I knew it was necessary.  My mom sent us a check for Christmas (thanks, mom!) and I ended up using a good portion of it to get my daughter a new winter coat off of Landsend.com.  They had 60% off plus free shipping (the free shipping is what I definitely go for as shipping up here isn't cheap and getting worse every day), so I spent a good couple of hours going through pretty much every winter coat they had to find one that was rated for low enough temperatures for up here and got it.  My daughter is dwarfed by the coat a bit, but she'll grow into it and she attests to the fact that it is warm and comfortable.

3.  I was able to load a coupon for a free bag of French fries onto my Carrs card one week and we definitely took advantage of it as my son actually likes that brand of French fries (I'm still working on getting him to eat home made French fries).  I also cashed out one fuel reward (before the month rolled over) and used it to get two free cans of green beans.  Since we were running a bit low on green beans, this was a good way to start to build up the supply.  This month I actually got five fuel rewards as a birthday gift from Carrs that were good all month, so I used those to get a free bag of frozen fruit (we got some raspberries) and another free bag of French fries for the freezer.  

4.  In previous years I've ended up throwing away the turkey giblets because I would just not have a use for them and would end up throwing them away from the freezer later.  This year I was determined that I would not waste them, so I called my mom and got her recipe for cooking giblets off of her as I remembered she used to cook the giblets and make giblet stuffing from them.  I made the giblet stuffing once after being married, but it made so much that once I wasn't feeding a crowd, I kind of moved onto other recipes for Thanksgiving.  I made a very delicious broth from simmering the neck and giblets (thanks for reminding me how to do it, mom!).  I ended up eating the meat off the turkey neck (I like it and have since I was a kid *laugh*) and then froze the stock and the giblets.  The giblets I'll use in home made stuffing later on (yum!) and the broth I am planning on adding to a big pot of turkey stock I'm going to make from the last of the Thanksgiving turkey parts and then I'm going to can it in pint jars.  I haven't done pressure canning in a long time, but I have decided it it is time to get back into doing it for the sake of being more self-sufficient.  I have other things I'm planning on water bath canning (frozen fruit), but honestly I'm waiting till after Christmas to even start canning things as I'm still recovering from being sick and I have other things to do before the holiday.  So, stay tuned for that.

5.  I mended another coat of my husband's.  I feel kind of bad that the mending pile has gotten so huge, so I'm trying to work my way through it and get things done.  

6.  I got a 5.00 check for doing some surveys online.  I turned around and immediately donated the funds to a tornado fund that the governor of Kentucky has set up.  I have managed to get together a couple of donations this season by doing surveys and other activities online.  It isn't much, but I am doing what I can.  I'm not mentioning this as a way to pat myself on the back or anything, please don't take it that way.   I'm bringing it up because you can do this too.  Like those who use apps like Ibotta or other money back sites for their normal shopping and things...maybe you could find a few dollars to take out of paypal and donate to your local food bank or other charity near and dear to your heart if you feel called in that direction.  

I was feeling really down this holiday season when I was sick and everything and looking at my budget getting tighter and tighter and more and more need from different places staring me in the face.  I really wanted to help, but didn't know how I could.  Using money back apps and things doesn't give much back to you, but it is a way to squeeze blood from a stone and let you help sometimes.  Just a thought :).

Oh also, you can sign up for Amazon Smile (not pushing it for Amazon's sake, but just mentioning it) and donate to a bunch of charities by just shopping through the Amazon Smile site.  Not sure if your chosen charity will be on there, but it is something to look into and it won't cost you a dime to do and will help out the charity you choose.

7.  I used a 15% off Michael's Rewards code to get a frame for my daughter for cheap so she could finish up a Christmas gift she's making.  

8.  When we ran out of blue baking sugar when making cookies, instead of running out and buying some, we just made some instead with some sugar and food coloring.  It worked perfectly and saved some money :).

9.  We really wanted to listen to Christmas music on the radio, but the radio reception at my house sucks.  So, I went and downloaded the IHeartMusic app and went and looked up their Christmas music station for free.  I then just blue tooth the music to my a little radio I have that doubles as a bluetooth speaker and it works fabulously.  My daughter loves it!

10.  I wanted something we could use for exercising this winter in the house, so instead of going out and buying something expensive, I went and dug around our storage van before the weather went super cold and found the stationary bike I had used when I was pregnant with both of my kids.  It a bit beat on, but still works perfectly well, so I hauled it up to the house (not easy, but I did it) and my husband managed to maneuver it through the garage and into the den, so we'll have it to work on this winter.  The kids are already getting on and using it for fun, so I'm doubly happy I did that :).

I'm sure there are more things that I'm forgetting, but I'll leave it there for now.  I'm just so grateful to be feeling somewhat human again :).  

Thursday, November 18, 2021

Keep Calm and Stock for the Apocalypse: A Quick Pantry Tour

By the way, the subject line was meant to make you giggle.  If you can't laugh, you cry.  Better to laugh, in my experience.

Anyway, it has been a while since I gave a pantry tour, so I thought I'd do a quick one.  Now, for those of you just starting out when it comes to food storage, do NOT think that you will be able to put this type of food storage together overnight and I hope to put up a post in the next little bit to hopefully help out a bit to get you started.  Honestly, I've been stocking up pretty hard over the last three years, since I started from a not great position after a year of an awful earthquake, a mice infestation in my pantry that wiped out a ton of stuff and other things AND living in Alaska we have to prepare a lot harder for unforeseen circumstances than in other places, so there is that going for me as well.  So anyway, the last few years, I was already in "build up the pantry" mode when certain worldwide events hit and put it into overdrive when I realized that my cost of living was looking to go berserk very quickly.  So, yeah, I have truly been in a mode, especially the past year, to get that one year (at LEAST) of food storage and other household goods stocked up as much as possible.  My husband and I have always worked toward putting up a year's worth of certain things every year, like we do tend to stock a year's supply of toilet paper and paper towels every year (thank goodness we normally did THAT when certain events hit), but the last bit, with inflation raising prices every time I go to the stores, I have been working hard on keeping more and more on hand to keep life as normal as possible in the coming months as items aren't available or we just can't afford to get them in with our normal shopping trips.  

I do have a few things that aren't done yet for the pantry that are on my "to do" list (things I have to process), but I'm fighting allergies the last few days, so I am not getting those done this week by the looks of it.

By the way, this is not my entire shelf stable food storage.  I have my long term food storage (freeze dried cans and things) kind of stored anywhere I can find room throughout the house right now.  I have bread flour, more pasta, corn meal, rice and things in containers stacked up in a corner so I have them to fill the holes in the pantry as I need to in the coming months.  It ain't a pretty set up, but I am glad to have it. 

Anyway, back to the matter at hand.  For one, you'll notice that I have a bunch of prepackaged mixes on the shelves by the door.  I did this quite on purpose.  For one, in some cases the deals were just too insane to ignore (like the 12 boxes of cake mix I ended up getting for 5.00), or I just wanted to make sure we had mixes that were peanut safe that I could stock up on for desserts and breakfasts (in the case of the muffin mixes).  The benefit of keeping the boxed mixes around is basically, in my mind, it helps to conserve my flour, sugar and other baking supplies for other things/projects and they have the side benefit of being easy to mix up so my daughter has definitely gotten into helping me make them when I make one up :).  And they were cheap enough, when I bought them, to make it worth my while to purchase them, so I am doubly happy to have them around.

So, some new things that you may notice that I'm keeping around and raise an eyebrow at.

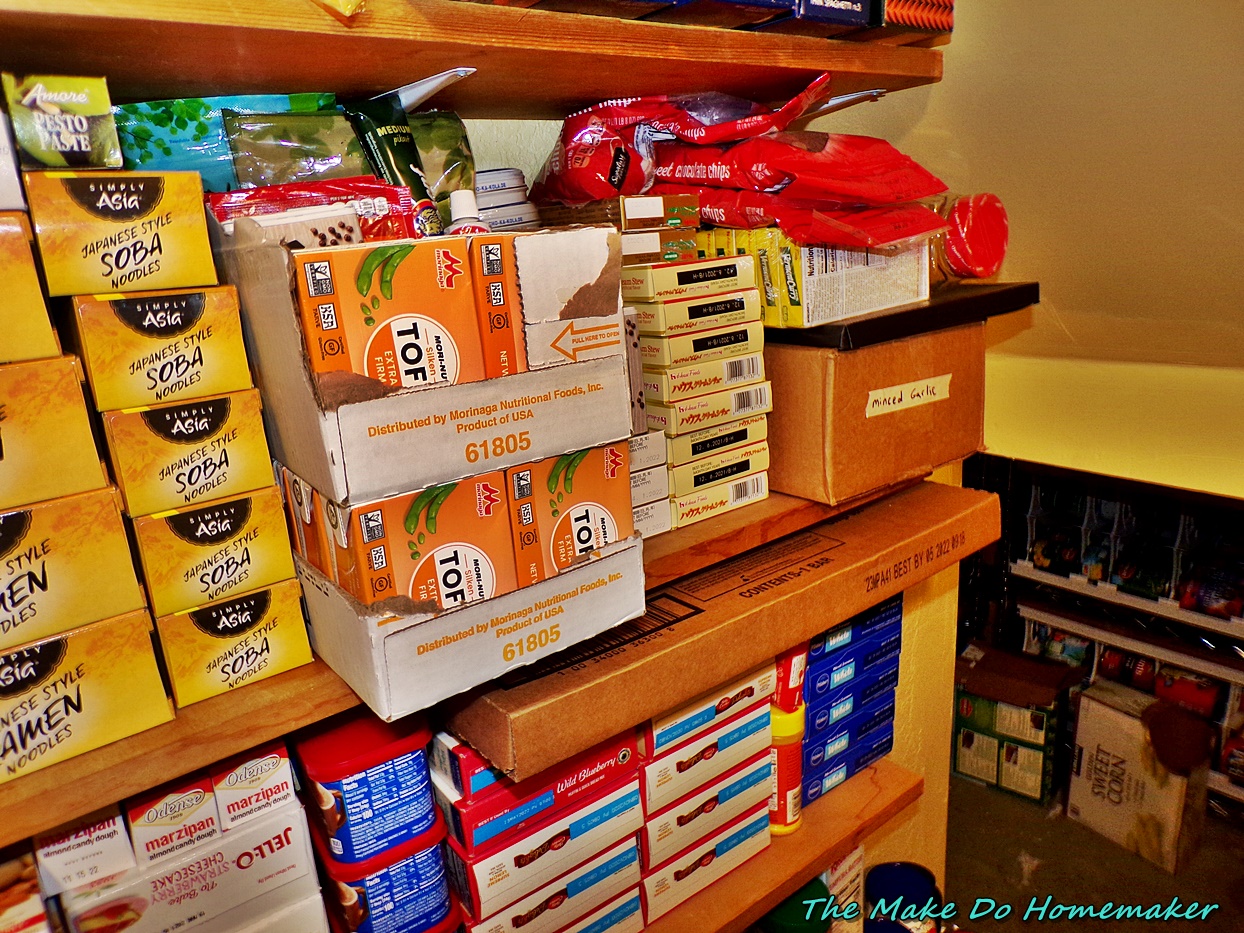
I have started, the last few years, to stock shelf stable tofu.  I buy a 12 pack off of Amazon and it'll last me a year.  It is American made, a bonus for me an keeps quite well on the shelf.  I primarily use the tofu to make miso soup.  The miso is missing because I keep miso paste in the freezer and fridge to help it keep as I read on some Asian blogs that was the best way to preserve it.  I get organic miso off of Amazon as well, at least for now, in a two pack and that'll last me a year.  I do use the tofu in an occasional other dish, such as Pad Thai or other stir fry as well, so it really is nice to keep around the pantry.

I also ended up buying Japanese soy sauce in bulk off of Amazon earlier this year (we like the flavor a lot better) as a six pack was on sale cheap, so that'll definitely last me quite a while (seen in the top photo, but the close up one didn't turn out).  I've found myself cooking Japanese a lot more than I used to the last few years, so you'll notice that I actually have an "Asian" section in the pantry with Ramen and Soba noodles and stuff.  I got the noodles super cheap earlier in the year when they had a coupon code stacked on top of the Subscribe and Save discount, so I got 6 packs of noodles for like 8.00, which was cheap for specialty noodles.  And hey, more pasta is not a bad thing in my opinion.

You'll also notice in the above photo some containers of specialty coffee drinks.  I bought those as a back up plan in case milk gets scarce as I like milk in my coffee, so I bought those as a way to get my creamy coffee if I need to ration the milk for other purposes (like for the kids as milk is one of the few "real" food items my son will consume, so I consider it an absolute necessity around here :).  I got some marzipan super cheap at the beginning of the year on clearance, so you'll see some boxes of that.  I really love marzipan, so I admit I bought more than I probably should have (never shop hungry).   I've been slowly going through the boxes and making different desserts that call for marzipan (our favorite, so far, has actually just been chocolate covered marzipan *laugh*).

Okay, so let's move to the other side of the pantry entry.  Over here I have additional storage buckets of flour and some containers containing popcorn and other items.  New over on this side is a big bag of citric acid, food grade, that I bought from Amazon.  I've messed with citric acid in the past so I have had experience making my own bath bombs and other uses.  I mainly got this as a good cleaner to have around (like your dishwasher cleaner is just citric acid, so it's a great thing to put in your dishwasher to clean off the scum and things if you can't find your dishwasher cleaner tablets and things), but it is good that I can use it for making candy and things if I need/want to.  Over on this side is some bottled water (in the brown "Alaskan Grown" box and there is more under it) and I keep all of my freezer bags, my emergency box of trash bags, cling wrap...other plastic goods, etc.  In the box on top of the salt reservoir for the water softener I have all of my coffee filters, some plastic cups, some paper storage containers for ice cream and some other miscellaneous things.  On the other side of the water softener tank (where the vinegar container is) is where I keep my bulk jugs of vinegar.  I have white distilled, apple cider and rice vinegar at the moment in gallon jugs as I use vinegar quite a lot.  I also have a bulk container of salt (the red lidded container there) and some bags of potatoes that I can't quite fit in my fridge yet.

As you go deeper into the pantry you'll see some of the canned fruit and vegetables.  I'm doing pretty well on being stocked up on things, but believe it or not I'm a little light on green beans (shocking, I know *laugh*).  I am so relieved every time I look and see a variety of things that we can eat in this area, after the dreaded "year of the green beans" as I like to call it now.  

Next up is the shelf next to the canned goods shelf, so we have ketchup (we have a ton of it, but we are going through it), BBQ sauce, some pizza sauce that my daughter likes (under the Oreos that I'm hiding from my son at the moment), a bunch of cooking oil (which you can't really see in the pic unfortunately), honey (as it keeps forever and works great as a sweetener in a pinch) and some miscellaneous cooking sauces and things (in the wine caddy...I have cooking wine, but I found it is a great storage container for other things as well).  On the bottom shelf I have my home canned sauerkraut and applesauce as well as some store bought applesauce (in case we run out of home made) and things.  It actually is rather well organized, although you really can't tell from the photos.  The big dark jug on the floor is actually Worcestershire sauce that I got super cheap on Amazon when I needed to get some for the house  From what I read, since the sauce is fermented anyway, it doesn't really go bad, so I thought I'd give it a shot (since it was the same price as a small bottle of the stuff at my local store).   

And here is the big change I made to the pantry, that took me forever (which is sad), but makes the lights in the pantry work a LOT better and lets me actually see what I have a lot better as well.  I moved the condiment shelf from the other wall to this one, so the light actually illuminates everything on the shelf.  It turned out to be a real asset doing that as I found some things I needed to use up when I moved the shelf and things, so I've been going through those items and using them for meals.  I also went through the #10 cans that I used to construct the shelf and traded some of them out with other cans that were longer termed storage (like the wheat replaced a can of dehydrated apples I need to use and things), so that was a double good reason to move the shelf.  

So, yeah, that about wraps up the pantry tour.  I feel pretty good about the pantry at the moment, I have to say.  I've worked really hard, especially the last couple of years, to start buying items that we'll actually use versus items we might use or just getting something I want to try.  So far I'm doing pretty well as I've gone through and found that I've been doing a good job rotating through the food storage and using up everything before it goes too far past it's use by date.  That's usually, to me, a good indicator of how good of a purchase a certain item was for the pantry.  If you end up throwing it away, don't buy it again.

I have gotten a few e-mails asking about what I consider to be the most essential items in my pantry to help give people a place to start.  I've been working on the list and will hopefully get that up in the next few days, so please, for those of you who have been keeping a pantry for a while, jot down some notes as well to share as I'm sure I'm going to forget things in my list :).  Hopefully it will help some people to have a starting point to work from.

Tuesday, November 16, 2021

Making Much With Very Little: Stuffed Steak Casserole

 So, as I stated a few blog posts ago, I have been really racking my brain on how to help people out as much as I can during this...well...mess seems actually a rather nice way to put it...that we are all in.  So, I brainstormed and brainstormed some more and one of the things that I did come up with was that I could definitely find ways to stretch a meal and/or make money stretch and share some of those ideas to hopefully help people out in my little corner of the internet.

So, first up is I'm going to be sharing more recipes.  Like this one.  I ran into an article stating that people are turning back to buying ground meat instead of whole cuts because it is cheaper, which I definitely understand, so I started thinking on different recipes I could share that would use ground meat.  I didn't really want to do the usual meatloaf or tacos as those are things people can just find anywhere.  I sat down and came up with a goal to share a series of recipes using ground beef (and hopefully share recipes where you can sub ground pork or chicken if you need to) that are simple, cost effective and filling.  Note, I no where in that sentence mentioned "super healthy" as really anytime you go for simple, a lot of times you end up sacrificing the healthy a bit, although I WILL try to make some healthy recipes here.  

Right, so here's the neat part about this series of recipes dealing in ground meat.  I am purposefully making them so you can brown up a big pot of ground beef (or whatever) and then just set aside 1 lb portions of said meat to use in recipes later. So if you buy a big bulk package of hamburger, you can just brown all of it to use later...this is intended to make it easier for those who have to work, for example, and just need some help with cheap and easy meals.  

The first recipe I came up with is based on one of my mom's old stand by recipes.  When I was a kid, my mom would take a cheap cut of steak, pound it super thin to tenderize it, make up some stuffing mix, throw it on the steak, fold said steak in half (so the stuffing was sandwiched inside), throw some gravy or cream of soup on top of it and bake it.  She called it stuffed steak and it was cheap, relatively easy (okay, pounding the meat wasn't really easy I doubt, but my mom did seem to enjoy taking her frustrations out on the meat) and a decently filling meal.  Open up a can of green beans (or veggie of your choice) and you have a decent meal.

I subbed out the steak for ground meat, redid the process a bit and voila!  Stuffed Steak Casserole is born!

Enjoy!


Stuffed Steak Casserole


Ingredients:

  • 1 lb Ground Beef (or other ground meat), browned and drained
  • 2 cans Cream of Mushroom Soup, undiluted
  • 1/4 cup water
  • 1 package stuffing mix, made to package directions (I used Stove Top for this recipe, but feel free to sub what you have...I also added about two hamburger buns worth of left over squishy bread to the stuffing to help pad the stuffing out a bit).
  • 1 tsp. Italian Herb Seasoning
  • 1 TBS dehydrated onions (or 1/2 to 1 tsp. onion powder)


Directions: 

1. Preheat oven to 375 degrees F.

2.  Mix ground beef, cream of mushroom soup, water, Italian Herb blend and onions in a saucepan, over low heat, and heat until well combined.  You can skip this step, but just be sure to whisk the cream of mushroom soup, your Italian Herb seasoning, the onions and the water really well before you add the beef if you are doing this cold, so you don't end up with weird chunks in your casserole.

3.  Pour mixture into an 8x8 Pyrex baking dish (or 2 quart casserole dish).  

4.  Spoon stuffing mix (after you fluff it up) over the top of the beef mixture, spreading it as evenly as you can.

5.  Cover and bake in 375F oven for 30 to 35 minutes or until mixture is bubbly and heated through to your liking.  If you like, bake for 20 to 25 minutes and then remove cover or aluminum foil and then bake the last ten minutes without a cover to crisp up the stuffing (depending how you like it).

6. Serve with vegetable of your choice (we obviously had green beans with ours).

Note:  This should freeze well.  Just let it cool well and then put a good layer of plastic wrap over the top and another layer of aluminum foil.  Before baking remove the aluminum foil, remove the plastic wrap (important!) and then place the aluminum foil back on the casserole.  You'll have to increase the baking time like 10 minutes I would say if you are baking from frozen.

I know I may catch some flack over the amount of sodium in this recipe and I get it, trust me.  But, you can definitely go with reduced sodium Cream of Mushroom soup if you want to cut down on the salt and you can also make home made stuffing to cut out the stuffing mix.  But, I was definitely gong for a quick and easy meal here.  Feel free to change it up as you see fit.

Friday, November 12, 2021

Frugal Friday: Money Saving Weekly Recap

 I know that this is a post that encompasses two weeks, again, but I am hoping to get onto a more even blogging keel here, now that I'm not running around like a mad woman trying to get everything buttoned up before winter officially reared it's head around here.  For instance, last week, I ended up spending most of the week running things from the house into our storage van as the weather was saying we were going to be going from the lower 40s to the 20s by the end of the week.  And I am SO glad I worked on getting things organized like that as the temperature did, indeed, tank at the end of that week and it was a LOT nicer doing those errands in warmer weather than in colder weather.  

Then, this week, I spent getting the pantry organization buttoned up (which, I think I finally got done yesterday, yay!!!), doing general household stuff, trying to get pre-winter cleaning done that I didn't get to earlier in the year since the weather was being so crazy and just generally trying to get chores done that I hadn't had an opportunity to get done of late.  So, I got the bathrooms scrubbed down really well, got all the of throw rugs in said bathrooms washed and dried and put back where they belonged, got SOME curtains washed and put back up, got screens pulled from a bunch of the windows (and put into storage for the winter) so I could really close our crank-out windows and seal them up tight.  Also with the freeze and thaw to outside, since the windows with the screens are only single pane versus double pane on the rest of the windows, it is a good way to stop mold from taking hold in the window frames by removing the screens so I can scrub the frames of the windows well throughout the winter as they ice up and thaw.  I made a list of what few things we would need for Thanksgiving shopping so we could get it done ahead of time, got the mounds of clean clothes folded and put away...things like that.  I also sat down the last few days and made a list of other things I want to get done between this month and next month.  So, in short, I'm feeling decently accomplished.

The last few days winter has officially started hard with a pretty substantial snowfall for the first big snowfall of the year.  We got hit with nearly two feet of snow between yesterday and this morning, so my husband ended up running the snow blower for the first time this year today.  Shot of the snow on the trees up top for your enjoyment :).

Anyway, let's get to other money saving things that have happened the last two weeks, shall we?

1.  We ended up staying home for Halloween this year and didn't do much other than make and decorate cookies, carve the Jack O Lantern, make Halloween chocolates and then we sat and watched our favorite Halloween specials while we waited for the icing to dry on the cookies.  It was fun, if quiet.  

For the cookies, we used food coloring and ingredients we already had and for the Halloween chocolates we ended up using chocolate chips out of the pantry to make them and put them in the fridge to keep them set.  The daughter especially is having fun raiding a chocolate out of the fridge on and off :).

2.  I mended another Carhart jacket of my husband's that had gotten torn badly.  He then helped me to get the zipper on said jacket unjammed and it seems to be working fine now.  Hopefully the mend I did will last a while as the tear was in a bad spot and I worry about it lasting.  We'll see how it goes.

3.  I am very proud of this one.  I fixed my food dehydrator!  I had asked my husband to maybe take it apart as the motor housing unit had cracked apart in the earthquake and it would no longer power on.  I decided to take it apart myself and see if I could fix whatever was wrong as I didn't have the money to buy a new food dehydrator and I had gotten two bags of lemons for really cheap (I had asked for lemons...you know...individual lemons...from the Pick Up and Go folks, but supposedly they were out of stock on the individual lemons, so they gave me two bags of lemons instead?  I know...I'm confused too.  So, I got two bags of lemons for 1.50 after my personalized price on lemons had kicked in, which was a great price, but a LOT of lemons to go through).  

Anyway, I took the food dehydrator apart, fixed some alignment issues on the switch for the power, redid the cord attachment to the food dehydrator (a wire had popped off of it's housing), put everything back together and it actually worked!!!  I was able to dehydrate the lemons earlier in the week, which I have to say I don't think I've ever gotten that much of a thrill out of dehydrating something before *laugh*.  Now I just need to see if I can save my Food Saver so I can get a few oxy absorbers out of my big bag of them and still be able to vacuum seal the oxy absorbers again so they don't go bad on me.  I'm worried I'm going to be WAY over my head on that project, but I'm going to give it a shot if I think it is worth trying.

But, yeah, I got the lemons dehydrated too, which was a relief as I already had one bag's worth in the fridge as lemon honey pickles and REALLY didn't want to take up more fridge space with more of them.  

4.  We made some Thanksgiving decorations as part of homeschool using materials we already had around the house.  That was actually a lot of fun and I think both kids had a good time.

5.  We took advantage of a 5.00 Friday deal through Carrs last week to get some things we normally buy really cheap.  By asking my husband to stop off in Eagle River at their Carrs we were also able to find cranberries on sale for Thanksgiving, so I was really happy to get those as I didn't have any luck finding them nearby.  He even found some fresh herbs for Thanksgiving, which is REALLY hard to find this time of year up here.

6.  I mended a pair of shoes with Shoe Goo.

7.  I mended one of the comforters my son uses on a regular basis.

8.  I dug out my sewing table while cleaning out the den so I can make a few Christmas gifts (hopefully).

9.  I was offered an e-coupon for a free bag of shredded cheese from Carrs, which I took advantage of with our normal grocery shopping.  I used it in a few dishes over the last week and it's already gone (we used the remainder for tacos a few days ago), so I was really happy to get it as it came in really handy :).

And yeah, I'm going to call it good there as I still have a bunch of stuff to do before getting kids ready for bed.  I hope you all had a great and productive few weeks here.  Also, spoiler alert.  Stay tuned here as I've got a bunch of different posts planned the next bit, including some new recipes.