First, thank you to those who have e-mailed or Facebook messaged me asking if we are okay. We are. The whole family has just been very, very busy as I know a lot of you are too. We have been kind of stuck in overdrive of late. I have just had this nagging feeling to get the house organized and more streamlined to make things run smoothly in the coming months ahead. I've talked to many people who feel the same way, so I'm definitely listening to the gut feeling and just keeping very, very busy. As a result, all of the projects and just general life stuff has definitely cut into what small amount of personal time I had. Hopefully this month will run smoother and I'll be able to get things working better on the blogging front :).
I'm not going to break this down into frugal this or that, but I am just going to give you a general update on things we've been doing around here. So, let's get to it.
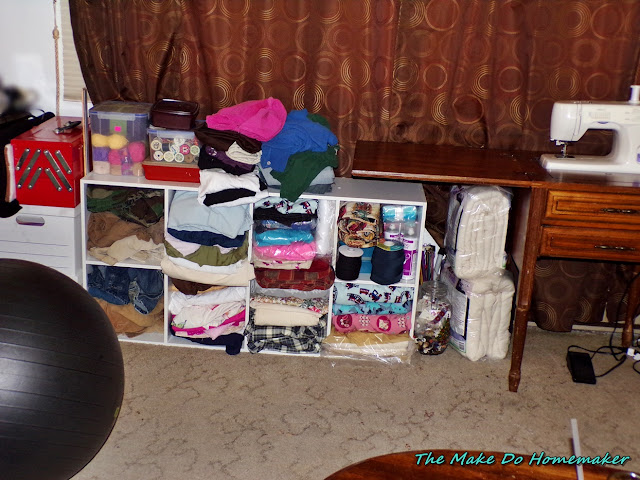
1. I started worrying about getting more mending and sewing projects done around the house, but my sewing things were scattered all over the place. So, I emptied off the white bookcase in the den and moved it upstairs after putting all of the books that had been on the bookcase into another spot. I then started going through the about 18 bazillion locations of sewing things in the house and managed to organize them all along the wall under the big window in the living room. I condensed a bunch of things into different plastic containers, even placing my yarn in ziploc bags to keep it safe from larder beetles. I put most of my thread in the drawers to the right of my sewing table in the picture and also managed to put my store of elastic and different types of binding tape (bias table, quilt binding, etc) in other drawers. I then moved my sewing table upstairs as well and opened it up so I could use the sewing table. I even have my button jar and everything in easy reach. I absolutely love the new organization. I've already finished about five different mending and sewing projects that I have been wanting to get to since the position of the sewing machine is way more convenient now and the best part is that I can do sewing projects while also keeping track of Alvah so he doesn't get into too much trouble while I'm working on something with him out of my sight.
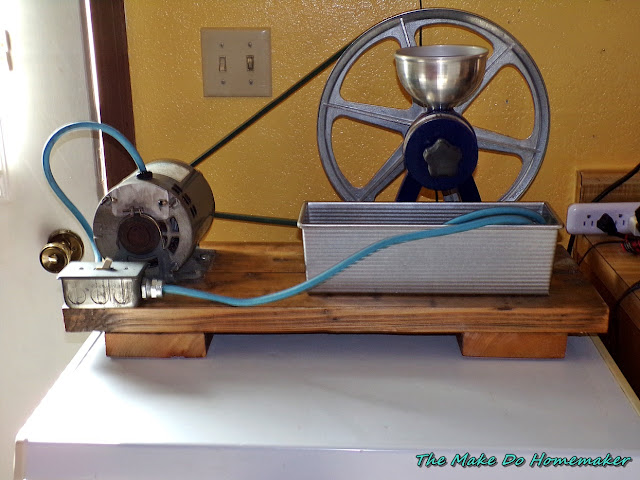
2. My husband finally got the wheat grinder motorized and set up!!! My arms greatly thank him for all of his hard work (as well as my back as I'd have to hold the cart that the wheat grinder was on with my foot so it didn't slide across the floor every time I used it, which led to an awkward stance to be sure. My husband used a motor he already had that he grabbed off of an old piece of equipment a friend had given him. He had to put in a few new bearings and had to clean it up, but it works good now. All totaled between the pulley we had to buy, the belt and other miscellaneous parts we spent about 100.00 motorizing the grinder. To just buy a pulley and belts from the outfit that made my wheat grinder would have cost us 100.00 plus shipping and if you added a motor to that it would have cost us well over 400.00 to motorize the wheat grinder. So, we saved a ton being able to do it ourselves. It is great having a husband with skills :). He even scabbed a piece of scrap wood from under our barn that the previous owners had left to make the base for the wheat grinder. Once he put a couple coats of polyurethane on it, it came out looking really nice and cleans up really easy!
I ended up cleaning off my small block freezer and put the grinder in its new permanent home on top of it. This works well all things considered as trying to find room to store it or to keep in on a countertop would have been hard to impossible. It does grind things fast and boy does it throw flour everywhere, but that seems to be a thing with electric grinders as a whole. I'm still working on a system to mitigate against the mess as it sprays flour all over my kitchen. I'll get there, I know it will just be a process of trial and error *laugh*.
3. I searched everywhere online for pantry inventory sheets that were mostly filled out for you and all you'd have to do is to fill in the amount/item count instead of filling in the description and stuff too. I found nothing and the sheets that WERE available seemed overpriced for what you got. So, I pulled up Excel and started working on my own. It's going to take me a while as there is a lot of different things to catalogue it seems, but I'm working on them when I have time. I'll try to share the finished product with you all when I'm done in case you have wanted sheets like these and couldn't find any, like me.
4. I started using the note writing app on my phone for tons of different things, but a big one that has come in handy is for making grocery lists. This way I don't forget my written list on my fridge (which has happened once, or twice, or a lot). It works great.
5. I gutted my bedroom closet a lot, as well as the kid's closets. I went through toys and blankets and comforters and things and figured out what could stay and what could go. We dropped off a ton of stuff at the used stores in the form of old toys the kids no longer play with. I took some zip up drawer type of totes that I bought on Amazon a while ago and we put the kids extra blankets and sheets in them and then stacked them in their closets. The daughter especially loves that the totes make it so her blankets are protected from bugs and things.
6. My husband sanded out and painted over spots of rust that were appearing on the body of my truck to help extend the life of my truck body.
7. Alvah's mental health doctor is opening her own practice. I filled out the release of information form and dropped it off at her current office so we can move Alvah over to her new practice. We did this errand and combined it with a bunch of others that we were doing to conserve gas consumption.
8. My husband took down an old and not ideal light fixture in our garage and put up one given to him by a friend of ours. Once we get a few more light bulbs for it, it will definitely light up the darkest corner of our garage very well. It already lights it up way better than the old light fixture did.
9. Carrs had 2 lb containers of strawberries on sale for 5.00 a piece on 5.00 Friday a few weeks ago. I have been trying to pick up frozen fruit since fresh has been expensive and hard to find, but when I saw that sale I went on Friday to see if we could find some strawberries for cheap. They had actually a good amount in stock, so I picked up 6 lbs of strawberries. I then sliced and froze most of them on cookie sheets in our nice new big den freezer and then I packed them up and vacuum sealed the strawberries to use later on. I was able to put up probably about 5 lbs of strawberries (after taking into account the parts I had to cut off the strawberries and the fact that my daughter ate some fresh as well) for nearly the same price as buying a 2 lb bag of frozen strawberries would have cost me.
Speaking of vacuum sealing, I have started making a real effort to vacuum seal meat, fruits and vegetables as I buy them to help to further protect them from freezer burn. Food is becoming even more of an investment than it used to be, so I want to make sure to protect that investment anyway I can.
10. A few things from readers. One: I got a tip about canning lids from a reader in case you can't find them in your local stores. She said that if you can't find lids locally to try Forjars.com. They have really good canning lids from what I have been reading and you can buy canning jar lids in bulk (no associate link or anything, if they even have those, just sharing the link :).
Also, some readers were asking for the price on heating fuel and propane and things around here. Honestly, I'm not really sure as we are on natural gas here, but the prices are at least double here what they used to be from what I've been hearing and it is already hurting people let alone what it will do to those poor people this winter. I'm not looking forward to my gas and electric bill this winter. I can imagine what those on heating fuel are looking forward to :(.
11. I started the long, arduous, involved, did I mention LONG, process of filing for guardianship of the son before he turns 18. There is a mountain, and I am not exaggerating, of paperwork to fill out for the process, so I am starting on it now so we'll be (hopefully) in good shape before the son turns 18. The paperwork, in itself, is exhausting as there is a lot of stuff to go through.
12. I worked on condensing and organizing my food storage some more, like putting all of my pasta together and things like that. It took a bit, taking time here and there, but I think I got a pretty good system of organization down now, which is nice.
13. I REALLY wanted either croissants or cheese Danishes for Mother's Day. We didn't have money for anything else, really. But, we couldn't find anything even close to either of those things at the store when we went shopping. My husband was able to find a tube of crescent rolls a few weeks later, though, and brought them home. So, I went online and saw what I could do with those and I found this recipe. I halved it since I only had one tube of crescent rolls. The recipe is definitely a keeper! It was awesome. I didn't even make the glaze for them and they were perfect!
14. I went through my spice cabinet and refilled all of the containers that were getting low from my bulk supplies that I put in the lower cabinet next to my stove. The cloth drawers I put down there are working out fabulously and I am so glad I did what I did. It makes knowing what you have so much easier as all I have to do is pull out the oils and things I have in the front and then pull out one drawer at a time to find what I need instead of having to bodily climb into the cabinet (short arms I have) to reach everything and put it all out on my kitchen floor until I find what I am looking for. Much, much easier under the new system :).
15. I flipped my kitchen table around (I haven't taken a picture yet, but will at some point I'm sure) to make it work better. I don't know why I waited so many years to try that, but it is working out great so far. It makes opening the kitchen door much, much easier.
16. When I was rearranging the den to accommodate the things on the white shelf, I also hauled all the school and office supplies I could upstairs to make home school access easier. It has already made life easier and we haven't even started school for next year yet *laugh*. The purple drawers actually have sewing patterns in them, but I still call it a win. At least everything is in the same room now :). Please ignore the wad of aluminum foil on the floor in front of them shelf. The son likes to play with aluminum foil from time to time and threw it right when I took the picture *laugh*.
17. Speaking of school, we finished up schoolwork for the year and I got all work samples and final grades into the homeschool and everything approved for the last of the year. I was very relieved to get schoolwork done so that I could start on other work that needed to be done around here. I did get the curriculum figured out for the daughter for next year and will have to order that after July 1st, which is going to be a bit rough as this is the first year where the majority of her school curriculum is only available via reimbursement so I'm going to have to put money on credit card and then pay it off when reimbursal monies come in. I also started figuring out, in a general sense, what things I want to work on with Alvah for next year.
18, I sewed a dresser topper for my son's room (he tends to put things wherever, so the more protections the furniture has from things like cups with ice in them, the better), mended a few shirts and put new buttons on one shirt for my husband in just the last week. I used only materials I had already to do the projects.
19. I went out yesterday and cut off the seeds pods that were already appearing on my rhubarb plant in the hopes that it would grow better. I harvested some rhubarb (it was late in growing this year, along with everything else) and some chives while I was outside, cleaned and cut them up and put them in the freezer to flash freeze. I'll take them out today and vacuum seal at least the rhubarb to use in projects later (I plan to can the rhubarb when the temperatures cool off a bit. We have been in the 80's for the last week, so the air conditioner is running and the LAST thing I've been wanting to do is can or bake).
And now for a garden update!
20. We went out on Memorial Day weekend and picked up plants for the garden for this year. My husband found some planters I had in the shed that we had moved from our old house and immediately disappeared after we moved here (don't you love it when that happens?) so I was able to plant all of the plants this year in one sitting instead of having to rotate out two plantings of things like swiss chard. I did, however, have my husband drill some holes in an old Rubbermaid tote we had and I used that as a planter for overflow swiss chard and a few lettuce plants. I spent a whopping 13.00 on plants this year and that includes some violas, a ground cover/vining flower and a flowering basil plant my daughter chose (I'm not sure if the flowering basil is actually an herb I can use as basil or not as it has small leaves compared to normal basil...I still have to look that one up). I just didn't have the money to really invest in a ton of plants this year and honestly there wasn't a whole lot available at the nursery in the way of variety when we went. My plan is just to buy things slowly throughout the summer that I need for canning (like I'm buying frozen fruit when I find that fresh is way too pricey or not available right now) and get things ready for canning that way, or just buy already canned items. This way I have back ups in place in case they are needed.
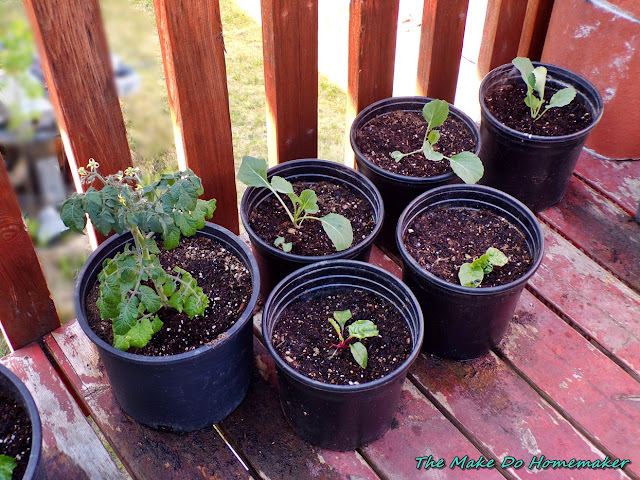
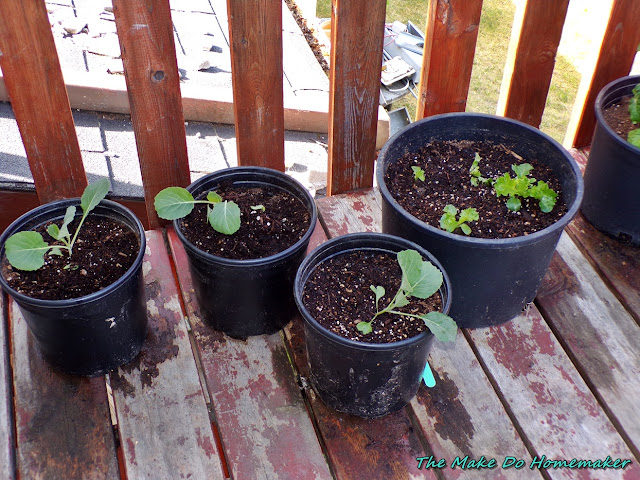
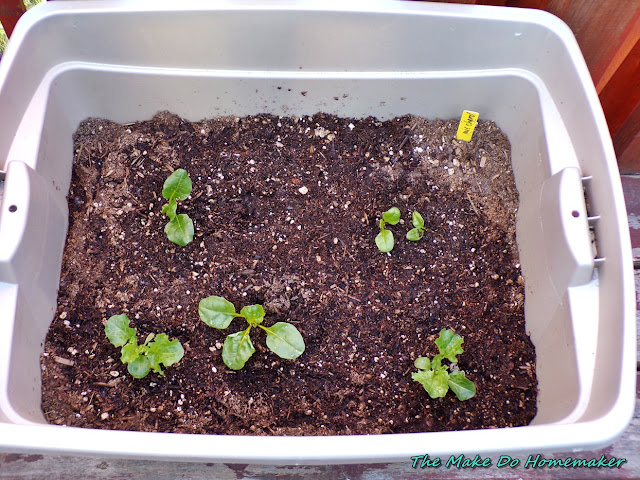
Back to the garden. I got a six pack of lettuce, a six pack of chard, a six pack of cabbages (these I am praying will make it and grow well as I want to make a bunch of sauerkraut this year. I'm also planning to buy in some cabbages to make even more as anything I can do to help shore up our supplies at this point I feel is not wasted). The seedlings are doing pretty well now that I've hit them with some fertilizer a couple of times and put them in some organic potting mix for container gardening. Hopefully they will continue to grow well.
The cat I planted is obviously taking over the container garden (he wouldn't stay out of the shot *laugh*.
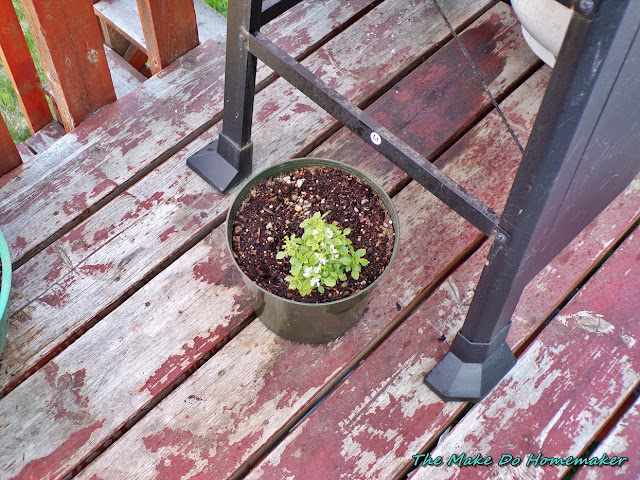
Spring/Summer was late this year and while it would get pretty warm during the day it was still getting pretty darn cold at night up until a week ago, so I didn't get to plant as early as I wanted to. The seedlings I tried to plant, died, with some help from a son who loves to play with seedlings for some reason and cats who ate them all off after the son opened the mini-greenhouse for them. Sigh. One day I will have an outside greenhouse, this I vow. I got early harvest cabbages, which I'm hoping will work out in my favor with how late Spring was. I also bought another Red Robin patio tomato plant this year and am hoping it produces well. I really wanted to get a bunch of those, but they were spendy this year (nearly double what I paid last year) for a developed plant, so I bought a seedling and transplanted it instead. It is growing pretty well now and has flowers on it in decent numbers, so hopefully we'll get some tomatoes out of it this year. I just staked it up with the stake that I had left over from last year yesterday, so at least it has grown to be at least a foot high if nothing else *laugh*.
So, that is the garden so far. I'm not sure if I'm going to get much else planted, honestly. I keep thinking of trying to plant some other things, but we'll see how far I get and if they even survive if I plant them.
I am going to work on getting some recipe blog posts up this week and a few other things, so here's hoping life goes well and I can get that done. In the meantime I hope you all had a very productive May and let's keep chugging along getting stuff done :).