Saturday, September 3, 2022

Super Easy Fast Sandwich Bread


Okay, first before I share this recipe, quick disclaimer, this is heavily, and I mean HEAVILY, based on La Fuji Mama's Simple One Hour Bread Recipe.  I have just tweaked it a bit to make the crumb fluffier and softer and put instructions in to cook it in loaf pans so you can make standard loaves with it and my times are a bit different than hers so it'll take you a bit more time to make this.  Anyway, I definitely support the original recipe and suggest you try both ways of doing things and see which one works for you :).

I'm posting this mainly because I just keep getting e-mails once in a while asking me to share my bread recipe when I show pictures of home made bread, so I finally gave in and am sharing it.   Please let me know if I'm missing an essential element somewhere.  I have made this so many times I have it memorized and only when writing it out I realized how hard it is to type something when you aren't actively making it in front of you *laugh*.

So, here you go.  Sandwich Bread in an Hour.  Enjoy!


Super Easy Fast Sandwich Bread

Ingredients:

  • 5 1/4 Cups Bread Flour
  • 1 1/2 tsp. kosher salt
  • 3 TBS sugar
  • 3 TBS Dehydrated Milk Powder
  • 1 1/2 Rounded TBS of Instant Yeast (I only use SAF Instant Yeast)
  • 1 1/2 TBS Cooking Oil (I like to use canola in mine)
  • 2 Cups Warm Water (not too hot or you'll kill your yeast)

Procedure:

1.  Preheat Oven to 375 degrees F.

2.  Spray two loaf pans (I use cast iron loaf pans) with non-stick cooking spray.  Set aside.

3.  Combine all dry ingredients except the yeast in the bowl of your stand mixer.  Mix the dry ingredients in the bowl together quickly (I just use the tablespoon I used for the yeast to do this) and then add the yeast on top (I do this so that the salt doesn't come in contact with the yeast and kill it).

4.  Add the oil and warm water to the bowl and attach your dough hook to the mixer.  Mix on low speed for one minutes and then scrape the sides of the bowl.  Set a timer for 5 minutes and speed up mixer to medium speed.  Mix dough for the five minutes.  When the timer goes off, stop the mixer and spray a small section of your countertop down with non-stick cooking spray.  Dump the dough onto the greased countertop (the dough will most likely be pretty sticky, this is not a bad thing) and fold the dough over to get some of the nonstick cooking spray on top of the dough.  Knead the dough a few times until you can handle it easily (it doesn't take long).  Take a bench scraper or knife (I LOVE my bench scraper for this) and cut the dough in half.  

5.  Round the dough into balls in your hands and then take the balls and shape them into loaf shapes that will fit in your pans (this might take a few tries before you get good at it and you might end up jamming your dough into your loaf pans a few times...don't worry about it...you'll get better at it :).  Place dough into your loaf pans and put plastic wrap over loaf pans.  Set loaf pans in a warm place and set your timer for 15 minutes.  

6.  When timer goes off check your dough.  It should be pushing on the plastic wrap at this point.  Carefully remove the plastic wrap as the dough will want to stick to it a bit.  If your dough is just hitting the top of your loaf pans (which mine at this is), set your timer for about five more minutes.  Keep an eye on the dough and once the center of the dough goes over the top of the loaf pan by a bit (I'd say like an inch, but it is going to do depend on your loaf pan and I don't want you to over-proof your dough), place the pans in the preheated oven.  

7.  Bake at 375 degrees for 35 minutes.  Remove bread from pans, turn them over in your hands (use oven mitts is my suggestion) and then tap the bottom of the loaves.  The bread should sound hollow when tapped.  Place the loaves on a towel to cool (I like to place them on their sides for a bit so that the bottom cool a bit first and then flipped them so that the side can cool as well).  Once cool, enjoy as a wonderful sandwich and toasting bread.  

Honestly, since I discovered this recipe my family won't eat store bought bread anymore.  I've even found another variation that my son will eat as rolls so I don't have to buy hotdog and hamburger buns for him anymore (I'll share that recipe later).  After finding this recipe I gave away my bread maker as I didn't need it anymore.  Who needs one when you can make bread, from scratch in about an hour?  

Enjoy all!

Tuesday, August 30, 2022

Where I've Been and What's Coming Up: Summer 2022, A Review

August is nearly over for 2022.  We are solidly into fall here.  The weather is getting colder, the rains are constant and the Alaska State Fair is going on in Palmer.  The garden is pretty much done for the year, yet another sign that winter is coming.  The cabbages did OKAY, a couple did well and a couple did measly, but they all got turned into sauerkraut that is set to complete its fermenting this week and will get canned by next weekend.  I have put up two batches of sauerkraut already, so it will be great to get it all canned up and on the shelf for hopefully the next couple of years (my goal at this point is to have two years of food put by when possible).  I harvested the chard all summer long instead of waiting for it to get big before harvesting it this year and I will definitely follow that formula from now on as it produced WAY more chard doing it that way.  As a result of my revelation (thanks to some gardening channels on YouTube)  I have a lot of bags of chard in my freezer; a situation I am far from displeased about.  We will be happy to have the chard this winter and beyond to enjoy.

The violas the daughter planted early in the summer never survived through the beginning part of the summer.  The violas didn’t seem to the appreciate the major heatwave we experienced and, despite my best efforts, they just gave up and died off.  I took the planter the violas were in and decided to plant peas instead so I didn’t waste the planter or the soil.  I was curious to see if I could get the peas to grow large enough to actually harvest some by the end of the summer as I planted the seeds way later than I normally would have in different circumstances.  But, I figured it was worth a shot.  And the peas grew, trellised nicely up my deck railing (they are refusing to bend over and start crawling along the top though, as you can see) and have produced some peas!  I am not going to get a big harvest, far from it, but I am going to harvest what I can in the next bit and then pluck all of the leaves off of the pea plant and turn the entire thing into edible pea pod soup for this winter.  I’ll add some frozen peas to help pad out the recipe.  Nothing will go to waste.  That’s a goal I normally have, but of late it’s become even more important to me. 

I am really enjoying the pea flowers, though.  The pink and purple are really pretty!  

This summer was actually kind of hard this year.  We couldn’t really afford to do much in the way of outings due to the cost of…well…everything.  The son’s allergies went nuts, first with all of the crud that was in the air up here due to all of the wildfires burning up north and also due to the weird transitioning of seasons we had this year and things.  Pollen counts and other allergens were BAD this summer and just made my poor kids miserable.  My daughter dealt with facial swelling unless she took Zyrtec everyday and the son’s eczema went berserk.  Not a great summer for feeling good, unfortunately.  

The son grew three inches and 20 pounds over the summer and as a result his medications stopped working.  Completely.  His mood deteriorated into self-harm and constant screaming.  In the middle of it all his doctor moved offices and it was hard to get in to see her to get his medications redone.  Luckily we saw her at the beginning of this month and got his doses recalculated and he’s doing much better as a result.  At least he’s sleeping again, which is good. 

The worst thing that happened was that we lost one of my husband’s best friends recently which has been really hard on the family at large as he was also the dad of one of my daughter’s best friends.  All of my husband’s family knew him quite well and he was basically a member of the family.  Armina is doing her best to keep in constant contact with her friend these last few weeks and is just trying to be there for her whenever she might need a friend.  It has hit Armina really hard as this was the first death my daughter has experienced in her life where she knew the person who passed away quite well.  Combine that with then learning how to help someone close to you, as much as you can, through grief and trauma as well, has been a maturing experience for her. 

Onto other matters, despite everything, I was able to can a decent amount of stuff this summer.  On top of July’s canning list I have another one to share here soon to show what else I made and/or tried this year on the canning front.  The majority of things we got from the CSA this year ended up getting preserved for later by canning or just freezing.  I don't think I'll be doing the CSA again next year, unfortunately.   The amount of people who signed up for the CSA this year was tremendous, so to not be in line for at least an hour (on top of waiting for the truck to show up) I'm having to get to the CSA pick up point a half an hour before they arrive to get in line really early.  Unfortunately, they haven't been prompt this year, either, so they have been regularly 15 to 20 minutes late, which has led to the son getting pretty darned cranky by the time they show up.  At least the people in line have been friendly and the conversations have been nice (or at least civil when people got really tired of waiting).  The wait times wouldn't bother me so much, honestly, if not for the downhill slide the produce has taken in quality this year.  It seems every week I'm having to throw away something due to rot or mold and it is obvious rot and/or mold that I would expect the CSA folks to catch (I mean it's hard NOT to catch slimy greens when you are putting them into a box).  I don't mind getting things dirty and such, as that's something you expect from farm fresh anything, but when the produce quality is bad to the point that I wouldn't pay for that produce at the store...it's time to quit.  We did get a decent variety of stuff so far this year compared to previous years where collards and/or kale took up the majority of the box every week, but the quality just isn't there compared to previous years, which has saddened me.  As a result of the produce being at the point of going bad on me, as soon as I get it home it goes into the freezer, gets used or gets put into a canning recipe after getting carefully cleaned and picked over by me.  So, at least I've got things put up for later if nothing else.   I was able to get a few heads of lettuce with the CSA, but not many this year, which was sad compared to previous years where we got a head of lettuce pretty much all through the beginning of the summer season.  As a result, I ended up using my lettuce this summer for salads.  Lucky for me, my lettuce did great this summer and lasted through the heat and into the rainy season before bolting, so we enjoyed a lot of salads this summer.  It was nice and I am hoping to find that variety of lettuce next summer to grow as it did great on the deck.


  I ended up eating tomatoes just with some salt from the CSA box as they were over ripe and on the verge of going bad when I got them.  I thoroughly enjoyed them, I have to say, as I love fresh tomatoes and since I don't have a greenhouse, growing big ones is out for me for now.  My patio tomatoes were kind of a bust this year.  I got tons of green tomatoes on my plant, but they just didn’t like to ripen.   I tried magnesium and calcium, different fertilizers and nutrients that other gardeners told me to try, but it didn’t help.  I had a few tomatoes ripen at the beginning of the summer and they immediately split, badly, from the heat.  After the first couple that ripened, most of them just remained stubbornly green.  I actually did end up with some decently big tomatoes, but they just would not ripen no matter what I tried.  I finally gave up and decided to use the green tomatoes instead as they were starting to rot instead of ripen on the plant.  I harvested a bunch a few weeks ago and used them in canning and then day before yesterday I went out and harvested the rest of the green tomatoes as the plant was almost completely dead and mold was starting to take hold on the bottom of the plant.  Those tomatoes I put in a bowl on my counter and I’m seeing if they ripen inside so I can eat them a few at a time.  So far I've had a couple turn to orange and was able to snack on those, so we'll see how the rest of them do.

I feel good having put up so much food for my family this year.  I’ll share how I am storing it too as I changed up the storage situation for my home canned goods so I could keep an eye on them.  I’ve lost several jars of things to lid failures so far this year, so I’ve become obsessive about checking them daily now.  Frustrating beyond belief and upsetting when you lose ingredients and time to something like that.  This is the first year I’ve had to deal with lid failures like this and I have to say…Ball has gotten a couple of nasty letters from me so far.  Not a happy camper am I.  

I was going to break down and order some "For Jars" lids online as people seem really happy with those lids, but they wanted 58.00 to ship my order (and I wasn't ordering very much!), which was WAY out of my price range as it more than doubled the original order price.  After I picked my jaw off of the floor, I closed the order window and went and looked up Denali Canning Lids, which I had seen ads for online and read a lot of good reviews on them.  I did end up ordering some Denali canning lids as I have been having a hard time sourcing lids locally on top of the lid failure issues (free shipping was definitely a plus in their direction).  They shipped quickly and the lids are down at my post office ready to be picked up.  So, I'll have to give those a try and see how they do.  Hopefully they work well.  I'll let you all know how they do.

I am finally getting to the end of food preservation for the season, unless I come across an awesome sale on like peaches or something and I get to can up those for winter, which would make the daughter’s year *laugh*.  I am antsy to get working on other things and am happy my canning list is getting shorter.  I’m on my last three items this week and then I can get onto doing things like working on Christmas gifts and the many other items on my always growing to-do list.  There always seems to be a list a mile wide to get done, but at least I feel like some things are getting checked off here and there.

Now that food preservation is pretty much done for the season and such, I am planning on getting back to regular blogging (I can hear the, “Sure, we believe you” from here as I know I’ve been saying that on every post for like years it seems).  I think I am going to go back to more of my old blogging type of format with some changes that will hopefully make things more fun and inspiring around here.  Like instead of doing a menu for the coming week, I think I’m going to do a review and recap of what we ate during the previous week so that I can share new recipes that I tried out during the week and things and what we thought of them.  This will also give me an opportunity to show how I’m using the food items I preserved so that if you are kind of intrigued by some and maybe want to try the canning recipes out, that you might be able to see different ways to use them in recipes for dinner and such.  So, stay tuned for that.  I’m also going to go back to sharing more of my day-to-day life as I do have things planned for this winter and hopefully I can share the journey on doing some of those things with you all.  Ever wanted to try and learn to knit socks?  I decided I want to try doing that with my novice level knitting skills.  It’ll be an interesting experience to be sure.

So, yeah, sorry I’ve been missing all summer long pretty much.  I’ve just been really busy and life has been really distracting around here.  I am going to work hard on being more active here on the blog and more present as a whole starting in September, so yeah…we’ll see you then!!!

Saturday, July 30, 2022

July Canning List (With Links to Recipes When Available)


Disclaimer:  This post contains affiliate links.  If you order through these links, Amazon will shoot a small commission my way for you using my link.  This does not cost you any extra money, but helps to support the blog (and my family) a bit.  If you order through these links, thank you for supporting the blog!

I was going to do a life update for July and then I realized that I had so much canning I did this month, that it kind of required its own post.  To those who have e-mailed and asked me to share what I'm canning and to share recipes...I'll give it a shot.   I don't mess with recipes too much, in all honesty, and for the most part I go for recipes from the Ball Complete Book of Home Preserving.  If I use a recipe I find online I make sure that I feel, personally, that the recipe is 100% safe to make.  I usually stick to jams, jellies and pickles for anything I find online and even then I'm careful to make sure it follows safe canning methods and things.

Anyway, now onto the huge list of things I've canned this month.  I still have more on my canning list for next month, on top of whatever I might get in my CSA box that I can preserve to have this winter (I've got a few pickling recipes bookmarked in various books to use if I should get certain vegetables again this year :) and I am going to put on my next round of sauerkraut to ferment to can up next month as well this weekend.  So, yeah, I'm busy right now :).

So, here is some of my "projects" that I did this month. I'll post links, when available within the title for each canning session. 

1.  Zucchini Relish (Source:  The 1870's Homestead on YouTube)

My first week on our CSA vetted me two nice big zucchini to do something with.  My aim this summer is to preserve EVERYTHING I can out of the CSA for later use (as well as the garden and everywhere else) for use later on, so this was the perfect opportunity for me to try a recipe that I saw online.  It is nearly 100% the Ball Recipe for Zesty Zucchini relish, she just uses different spices that sounded better to me, so I used her recipe instead :).  It turned out really yummy and that's before it'll sit and mellow in the pantry, so I'd say it was a success.  I only had 6 cups of packed shredded zucchini to work with, so I halved her recipe and it came out perfectly (basically very little left).

2.  Blueberry Syrup and Raspberry Jam

Both of these recipes I got from the Ball Complete Book of Home Preserving.  However, with the raspberry jam, I went ahead and doubled the recipe and then I did can it in pints or 12 oz jars versus half pints  the recipe called for (processed 15 minutes in water bath versus 10 for 1/2 pints).  It is not recommended to double jam or jelly recipes as the pectin can get messed up in the recipe and it won't set, but I've never had a problem with raspberry jam.  I used frozen raspberries for this and it came out just fine.  I used bulk pectin and used 6 tablespoons per box of pectin.  But, if you are worried about the jam setting up, just make one recipe amount at a time and follow the directions.  Jam is seriously one of the easiest things to learn to can, so if you are a beginner, I'd go for that first :).

I ordered some Weck Jars with some credit card rewards points and decided to use those on some of the blueberry syrup as it tends to go everywhere when my husband is putting it on his pancakes with regular jars.  Weck jars are definitely turning into a learning curve for me.  They sealed great (lifting jars by glass lids with a rubber gasket standing between you and a huge mess to check the seal, is scary I had to admit), but trying to figure out headspace for a completely glass jar and lid with lids that recess down into the jar and things was confusing.  I know I'll improve as time goes on, but it was a bit more of a guessing game than I wanted it to be.  I also had to use a small funnel instead of a canning funnel with them as the opening at the top of the jar was too small to fit the canning funnel.  They are pretty, but are kind of a pain to work your head around.

Funny enough, I messed with the blueberry syrup recipe as well by putting the syrup into 1/2 pint jars, as I've done for years (or in the case of the Weck jars the measurement is a bit different yet) instead of full pints.  But, I still processed at the pint processing time for safety (that's a food processing guideline by the way...always go with the longest processing time if you are canning more than one thing or if you are downsizing your jars, etc).

3.  Easy Grape Jelly

I had bought a nice bottle of concord grape juice to make into grape jelly, put it aside and told the family it was for JELLY and not to touch it, looking forward to making jelly the next day.  Sure enough the teenage daughter heard nothing I said and cracked it open and proceeded to drink it down like the expensive treat it was.  After I got over my sputtering, infuriated ranting about how could anyone assume that a bottle of juice, set on the back corner of the counter with canning stuff all around it was for drinking, I went and found an alternative.  So, I ended up making grape jelly out of the white grape juice I had bought for the family to drink, instead (I prefer for the family to drink white grape juice for the sake of staining safety, so that is what we normally have for drinking in the house).  Not as pretty, but at least I got it done.  Seriously.  Teenagers.  Sigh.

4.  Sauerkraut  (Source:  Bella Online)

I've made this recipe for sauerkraut for years.  Yes, it is kind of a cheat, but I still use it and it does ferment nicely in the mason jars :).  I use the Ball Complete Book of Home Preserving instructions when I go to can the sauerkraut.  I don't let the mixture seal in the jars during fermenting and call it good...call me paranoid, but I like the whole processing process just to be sure it'll last on the shelf without picking up some funky flavors.

I LOVE this recipe for sauerkraut because you ferment in quart mason jars, which helps to keep the kraut clean and makes it easy to check up on how the fermenting is going.   I do a couple of things different from time to time.  I half the water during the fermentation stage and then add the additional 8 cups of water back into the recipe before I can it.  It gives you a slight ferment to the cabbage instead of a major one when the ferment period is up.  And since you essentially double the salt during the ferment, the cabbage ends up coming out with a crunchy consistency instead of being mushy when it is all said and done.  It came from me making a mistake on the water measurements one year as a new mom and it ended up being a happy accident when we tasted the final product.

This year I'm going to rotate batches between regular fermented kraut and then the slight fermented kraut and use them for different purposes throughout the year.

But, yeah, after all of that, the first batch of sauerkraut for the year is put up and the next batch is going to be put up this weekend to ferment.  Every year I put up more and more sauerkraut and every year we continue to go through it by the time of year is up.


5.  Apple Cider

I canned up fresh apple cider I had bought last year and froze for later use to keep it fresh.  I mulled one gallon of it with whole spices and just simmered it for a bit before removing the spices and canning it and the other gallon I canned without mulling it.  This will be drank, happily, through the winter months, by me if no one else (I LOVE apple cider :) and this way it will be in small enough portions that it won't turn into apple cider vinegar before I can finish it.  This will also help me come Thanksgiving when I make my green beans as that way I won't have to mull apple cider up from the store to make it.

I followed the Ball recipe (linked above) for processing times and head space.


6.  Tart Cherry Jelly

I had bought some tart cherry juice to try to drink it at night to help with sleep quality and also to help with inflammation in my back.  I was really hoping it would all work great and I wouldn't have to take pills anymore when my back was really bugging me.  I tried to drink it, I really did.  I even love cherries, so I assumed it would work out great.  Yeah...it was just too much for me.  I had to add a bunch of sugar to make it palatable and it just seemed like I wasn't winning doing it that way.  So, I just looked up the Ball recipe for tart cherry jelly and made a recipe of it.  It came out great.  The daughter really likes it and can't wait to eat it later as it, "tastes like fresh cherries".  Works for me!!!


7.  Miso Pickled Relish

This was a recipe I came up with.  I got three huge kholarbi with my CSA box last week (the lady in front of me gave me hers) and I tried to think of what to do with them before they went bad on me.  I looked online and found that kholarbi isn't recommended for pressure canning (which I wasn't planning on doing anyway), but other than that I couldn't find a lot on pickling them other than they made good pickles (internet fail there).  I know that pretty much everything can be pickled safely, so I decided the biggest threat was making sure the brine would get through the kholarbi and pickle it safely since it is pretty dense.  So, I figured, what better way to get around density in a vegetable than to grate it and turn it into relish.  I used a Miso Pickled Vegetable recipe I found in the The All New Ball Book of Canning and Preserving and used that brine as the base.  I then shredded the kholarbi, some peeled and well cleaned carrots, a big onion (also from my CSA box) and some different colored bell peppers I had.  I put the shredded veggies into a big non-reactive bowl and then mixed them in with 1/4 cup canning salt.  I let them sit in the fridge in the salt for 18 hours and then drained the veggies well the next day, rinsed the veggies four times (to try and remove all of the surface salt), pressed out as much moisture as possible and then added the veggies to the now boiling brine.  I brought the mixture back to a boil and was ready to can it up.  I processed the 1/2 pint jars for 15 minutes (the amount of time on the original pickles recipe in the book for pints).

The only thing I wish I had done differently was one, I didn't catch a dent in one of my ball lids and ended up with a seal failure because of it (I have found a bunch of the flats of new jars are coming with sub-par lids on the jars, so be sure to check that before you use new jars!) and I wish I had been less distracted by the son so I could have removed all of the whole sesasonings that the original recipe called for before I added the veggies to the brine.  So now I have relish with whole peppercorns and whole mustard seed floating in them.  They'll be tasty still, but nothing quite like running into a peppercorn when you are trying to eat some relish.  Doh!

One advantage to having a failed jar, I guess, is that I was able to try the relish.  It is very tasty.  A bit tangy yet, but I'm going to try it again in a few weeks after it gets a chance to mellow out and I'll try it again :).

And there you go folks.  My canning adventures this month.  I still have a list to complete yet, but I am happy with what I've gotten done so far (especially when I include the other stuff I made back in February and such to add to the pantry).  I hope your summer is being productive so far as well!

Tuesday, July 12, 2022

Cream of Ham Bone and Potato Soup

This recipe comes to you from my grandma, who used to make this every year when the weather would get cold and she'd pull out one of the hambones she's store up in the freezer to make soup with.  As grandma used to say, when it comes to this recipe, "Use what you have.  You have a hambone, use a hambone.  Don't have a hambone, use bacon.  Don't have fresh milk, use evaporated, half and half, cream...whatever you have that you need to use up.  Take what vegetables you have in the freezer in little baggies and add those in or use what you have in the fridge that needs to be used up.  Simple as simple can be."

I pull out this recipe, usually about the time the hambone from Easter or New Years has fallen on my foot at least five times and I get fed up and decide it is time to use it.  It makes a really flavorful soup and is wonderfully comforting.

Sure, it's roughly 80 bazillion degrees out in a lot of places, but hey, put this in your recipe file to try when the weather gets cold.  Trust me, it's worth it :).


Cream of Hambone Soup

Ingredients:

  • 1 hambone, boiled and meat removed (reserve meat)
  • 4 Cups diced potatoes (russets work best for this)
  • 1 Medium onion, sliced thin.
  • 1/2 bell pepper, diced (I usually freeze bell pepper already diced and just grab a handful to throw into this recipe)
  • 1 to 2 stalks of celery, sliced
  • 1 stick butter (yes, this is a lot, I know, but it really adds a ton of flavor to the dish!)
  • 2 Cups milk (1/2 and 1/2, cream or evaporated can all be substituted or used in this recipe.  For this particular recipe I used 1 cup of cream that I had to use up from another recipe and 1 cup of UHT low fat milk).
  • 2 cups water or chicken stock (you might need less, but I usually end up using the full 2 cups for this)
  • Salt and pepper to taste

Directions:

1.  Melt butter in a medium stockpot over medium heat.  Add vegetables and ham and sauté in the butter for 5 to 10 minutes, stirring often until most of the butter is absorbed into the vegetables and the vegetables are starting to cook.  My notes from grandma said you could use lard instead of butter and that it was tasty, but I've always used butter. 

2.  Add enough water (or chicken stock...I always use chicken bouillon added to the water to give the soup a real depth of flavor that way) to cover the vegetables (you might not use all of the liquid that is in the ingredient list) until they are submerged.  Lower heat and simmer soup until potatoes start to fall apart.  

3.  Add your milk (or milk mixture).  Stir well.  Bring mixture back up to a simmer and simmer until it is as thick as you like it (I like to add cream to it as it comes out really thick in the end, but that is up to you on how thin you like your soup).  Add salt and pepper to taste.

Serve with crusty bread (grandma's instructions, not mine :).


I know this is kind of an odd "use what you have" type of recipe, but that's how it is meant to be.  Grandma said she got the recipe from her mom when she dictated it to me years ago, so it's definitely written in the era of, "Add water until enough.  Stir until done" types of instructions *laugh*.  I hope the recipe turns out for you as well as it does for me.  Enjoy!

Thursday, June 23, 2022

Cornmeal Mush: Appalachian Staple to Struggle Recipe

If you are looking for a recipe that calls for like two basic staple ingredients, boy do I have the recipe for you!

When I was a teen, I had some major problems with my stomach.  I was later diagnosed with a stomach condition which explained my gut always giving me a hard time with what I ate, but when I was a teenager in public school, it got to me something fierce.  I woke up one morning, prepared to do my usual ritual of drinking a glass of milk or getting a piece of toast and preparing for my stomach to not be happy with my choice, when I walked into the kitchen and found my mom cooking.  My mom, being a person who hated mornings more than your average vampire, always staggered to the coffee pot after being harshly awakened by the alarm clock and then proceeded to glare at the world at large until after her second cup of morning ambition.  So, to see my mom awake at the early hours I had to be up to catch the school bus, let alone cooking, made me stand there with my mouth hanging open in shock a bit.  She looked up from the stove and motioned me to the table and said simply, "Sit down.  I made you something that my grandma used to make for me when my stomach gave me issues."  

I sat down at the table, wondering what she was making.  It didn't smell like anything I recognized, so I was curious to say the least.  After a few minutes she put down a plate in front of me and I studied it kind of baffled as to what it was.  On the plate there looked to be slices of pudding or custard that had been browned/fried on each side.  She put the maple syrup in front of me next and got me a fork.

"This is cornmeal mush," she said simply, "try it."

I, always a lover of anything that maple syrup was involved in, poured some maple syrup over the top of the slices and then sliced off a chunk with my fork and chewed it carefully.  I immediately fell in love.  The mixture tasted of cornmeal, was creamy in the middle (with a bit of grainy since it was cornmeal) and had a tasty crunch to the exterior.  I later found out that cornmeal mush was a staple of the Appalachians, especially among the poor coal miner crowds and I could understand why it was so popular.  Very cheap to make, filling and tasty.  How could you go wrong?

To this day, cornmeal  mush is still a favorite of mine.  I don't make it so much now that I'm married as my husband doesn't like it, but every once in a while I make it, especially during the winter months.

Ingredients couldn't be simpler.  You start with cornmeal and water.  That's it.  If you have salt, it definitely adds something to it the recipe to add some in.  You can make it sweeter by adding a few teaspoons of sugar.  You can even get crazy and add some ground sausage and things to the mix itself.  My mom would take a few pieces of bacon and crumble them over the top when she ate hers.  I have always liked mine with just maple syrup on top.  Go as crazy as you want with this, but if you are looking for a simple pantry recipe to make for breakfast, this is definitely a good one to try.

So, here you go folks.  One of the simplest recipes you'll find out there.  Just be careful in the thickening phase and be sure to stir it as you don't want to scorch it to the bottom of the pan!


Cornmeal Mush

Ingredients:

  • 2 3/4 cup of water
  • 1 cup yellow cornmeal
  • 1 cup cold water
  • 1 teaspoon salt
  • 1 teaspoon sugar (to one tablespoon, depending how sweet you want it, or omit if you wish)
  • 3 TBS butter (or other frying oil of choice)
  • Maple syrup

Directions:

1.  Coat  an 8x4" standard loaf pan with non-stick spray.  Set aside.

2.  In a saucepan, bring the 2 3/4 cups of water to a boil over medium heat.  Mix cornmeal with sugar and salt.  Add in 1 cup of cold water to the cornmeal and whisk well to combine.  Add mixture to the boiling water while stirring constantly to help keep the mixture smooth.   Cook mixture until thick.  Reduce heat to low, cover, and cook for five minutes, stirring occasionally.

3.  Pour mixture into loaf pan, cool and then refrigerate, at least two hours, but preferably overnight.  

4.  When ready to prepare, invert loaf pan onto a cutting board.  Slice into preferred thickness (some like to go as thick as an inch, but I normally do about half of that as I like thinner slices).  Melt butter in a frying pan and add slices of mush.  Fry on both sides until as brown as you like it, if you like it golden brown it will take about 8 to 10 minutes on medium low heat.  I like to keep the temperature lower so that the pieces get nice and hot all the way through and then crisp up the outside at a higher temperature at the end, but that is personal preference.

5.  Serve with maple syrup drizzled over the top.  Honey works as well.  Can be served with typical breakfast fair such as bacon, sausage, or eggs.

Enjoy!

Wednesday, June 8, 2022

Sour Cream Kuchen: A Canned Fruit Recipe

I have had this recipe for Sour Cream Kuchen for years and made it just this last week as I had a pretty much brand new thing of sour cream that was already tasting like it was going to start going bad on me.  I had a bunch of it left, so just putting it in tacos or something was out, so I searched through my old file of handwritten recipes that I had collected for years and found this one.  I have made it on and off over the years.  I believe I originally got it out of a "Taste of Home" magazine from a LOONNNNGGG time ago, but I really can't be sure.  I wrote it down in my book of recipes is all I can really tell you.  The nice thing about the cake is that it calls for canned fruit.  I've made it with peaches, pears, fruit cocktail even.  All were good.  The cake has a cookie like crust, kind of like a lemon bar crust.  The center of the cake is a tasty fruit filling and then the top is a nice and savory custard type of concoction made with sour cream and eggs.  

I have found that while the original recipe calls for egg yolks, I have a few times forgot to separate my eggs (gotta love mom brain) and just used the whole eggs and it came out just fine.  This time I purposefully used the entire egg as I didn't want to potentially waste an egg if it separated wrong.  I'll make notes to what I changed in the recipe.  If you have sour cream in the house, though, and would like to eat something different, pull out a can of fruit from your pantry and go to town!!!

Note that the original recipe called for Peaches if you want a good starting point to work from.

Canned Fruit Sour Cream Kuchen


Ingredients:

Fruit and Crust Part:

  • 1 1/2 cups all purpose flour
  • 3/4 cup sugar, divided
  • 1/8 teaspoon salt
  • 1/4 teaspoon baking powder
  • 1/2 cup cold butter, cut into cubes
  • 1 can fruit of choice, drained (I prefer peaches or pears.  This would be standard can size, so like 15 oz can size)
  • 1/2 teaspoon ground cinnamon
  • Other spices (optional):  I use about 1/8 tsp of ground ginger and 1/8 tsp of nutmeg if I'm using pears to help up the flavor profile a bit since pears tend to be milder tasting than other fruits.

Custard Topping:  

  • 2 egg yolks (or use whole large eggs)
  • 1 cup sour cream
  • 1 1/2 tablespoons sugar
  • 1/8 teaspoon cinnamon

 Directions:

1.  Preheat oven to 400 degrees Fahrenheit.

2.  Grease bottom of an 8 x 8 inch baking dish.  I use non-stick cooking spray.  This just makes it easier to extract the cookie crust later on.

3.  Mix 1/4 cup sugar with flour, baking powder and salt in a bowl.  Cut in butter chunks into flour mixture (I use my finger tips to do this, but you can use a pastry blender, a couple of forks, a couple of knives, a food processor...whatever you find works best) until it resembles coarse crumbs.  Press mixture into the bottom of a 8 x 8 inch baking dish...try not to push it down too hard as it can get pretty dense and hard to cut if you are not careful.  

4.  Take remaining 1/2 cup sugar and mix with the cinnamon and other spices (if using).  Take drained fruit pieces and place evenly over crust and then pour the cinnamon and sugar mixture evenly over the fruit.

5.  Bake for 15 minutes at 400 degrees or until crust is golden.

6.  While the crust is baking make the custard topping.  Mix egg yolks (or whole eggs) and sour cream together.  Mix again after you pull the crust from the oven and then pour the mixture over the still hot crust.  Combine the 1 1/2 tablespoons sugar and the 1/8 teaspoon cinnamon and sprinkle over the top of the custard topping (or, if you are in a hurry or don't read it right you can just add the sugar and cinnamon directly to your egg and sour cream mixture...it'll come out fine).

7.  Bake at 400 degrees for an additional 30 minutes or until golden brown.  Can be served hot or cold (I prefer cold).  Refrigerate leftovers.


Enjoy!

Monday, June 6, 2022

What I've been up to: A Life Update


First, thank you to those who have e-mailed or Facebook messaged me asking if we are okay.  We are.  The whole family has just been very, very busy as I know a lot of you are too.  We have been kind of stuck in overdrive of late.  I have just had this nagging feeling to get the house organized and more streamlined to make things run smoothly in the coming months ahead.  I've talked to many people who feel the same way, so I'm definitely listening to the gut feeling and just keeping very, very busy.  As a result, all of the projects and just general life stuff has definitely cut into what small amount of personal time I had.  Hopefully this month will run smoother and I'll be able to get things working better on the blogging front :).

I'm not going to break this down into frugal this or that, but I am just going to give you a general update on things we've been doing around here.  So, let's get to it.
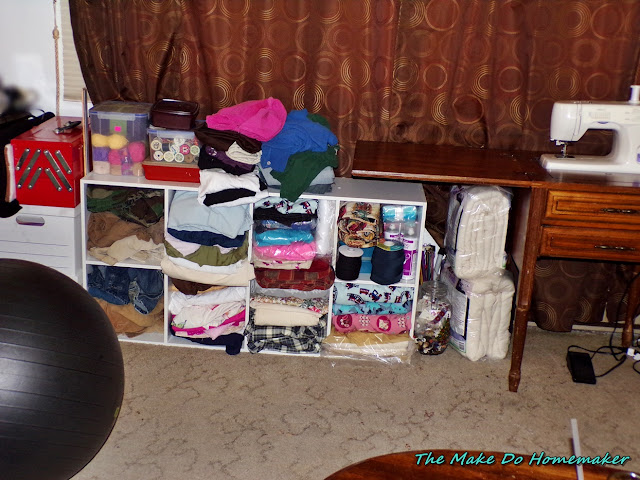
1.  I started worrying about getting more mending and sewing projects done around the house, but my sewing things were scattered all over the place.  So, I emptied off the white bookcase in the den and moved it upstairs after putting all of the books that had been on the bookcase into another spot.  I then started going through the about 18 bazillion locations of sewing things in the house and managed to organize them all along the wall under the big window in the living room.  I condensed a bunch of things into different plastic containers, even placing my yarn in ziploc bags to keep it safe from larder beetles.  I put most of my thread in the drawers to the right of my sewing table in the picture and also managed to put my store of elastic and different types of binding tape (bias table, quilt binding, etc) in other drawers.  I then moved my sewing table upstairs as well and opened it up so I could use the sewing table.  I even have my button jar and everything in easy reach.  I absolutely love the new organization.  I've already finished about five different mending and sewing projects that I have been wanting to get to since the position of the sewing machine is way more convenient now and the best part is that I can do sewing projects while also keeping track of Alvah so he doesn't get into too much trouble while I'm working on something with him out of my sight.
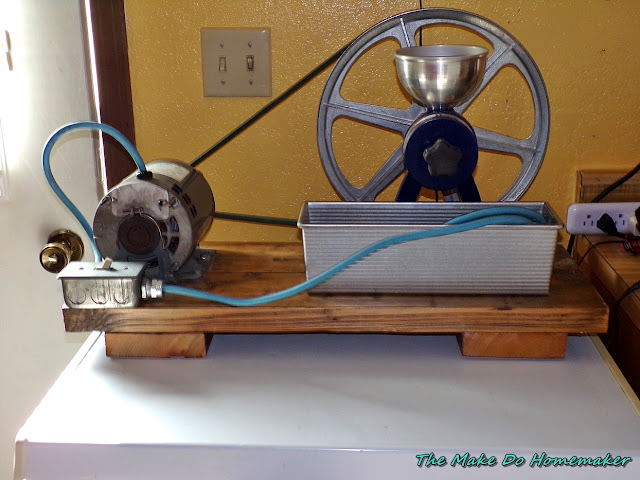
2.  My husband finally got the wheat grinder motorized and set up!!!  My arms greatly thank him for all of his hard work (as well as my back as I'd have to hold the cart that the wheat grinder was on with my foot so it didn't slide across the floor every time I used it, which led to an awkward stance to be sure.  My husband used a motor he already had that he grabbed off of an old piece of equipment a friend had given him.  He had to put in a few new bearings and had to clean it up, but it works good now.  All totaled between the pulley we had to buy, the belt and other miscellaneous parts we spent about 100.00 motorizing the grinder.  To just buy a pulley and belts from the outfit that made my wheat grinder would have cost us 100.00 plus shipping and if you added a motor to that it would have cost us well over 400.00 to motorize the wheat grinder.  So, we saved a ton being able to do it ourselves.  It is great having a husband with skills :).  He even scabbed a piece of scrap wood from under our barn that the previous owners had left to make the base for the wheat grinder.  Once he put a couple coats of polyurethane on it, it came out looking really nice and cleans up really easy!

I ended up cleaning off my small block freezer and put the grinder in its new permanent home on top of it.  This works well all things considered as trying to find room to store it or to keep in on a countertop would have been hard to impossible.  It does grind things fast and boy does it throw flour everywhere, but that seems to be a thing with electric grinders as a whole.  I'm still working on a system to mitigate against the mess as it sprays flour all over my kitchen.  I'll get there, I know it will just be a process of trial and error *laugh*.

3.  I searched everywhere online for pantry inventory sheets that were mostly filled out for you and all you'd have to do is to fill in the amount/item count instead of filling in the description and stuff too.  I found nothing and the sheets that WERE available seemed overpriced for what you got.  So, I pulled up Excel and started working on my own.  It's going to take me a while as there is a lot of different things to catalogue it seems, but I'm working on them when I have time.  I'll try to share the finished product with you all when I'm done in case you have wanted sheets like these and couldn't find any, like me.

4.  I started using the note writing app on my phone for tons of different things, but a big one that has come in handy is for making grocery lists.  This way I don't forget my written list on my fridge (which has happened once, or twice, or a lot).  It works great.

5.  I gutted my bedroom closet a lot, as well as the kid's closets.  I went through toys and blankets and comforters and things and figured out what could stay and what could go.  We dropped off a ton of stuff at the used stores in the form of old toys the kids no longer play with.  I took some zip up drawer type of totes that I bought on Amazon a while ago and we put the kids extra blankets and sheets in them and then stacked them in their closets.  The daughter especially loves that the totes make it so her blankets are protected from bugs and things.  

6.  My husband sanded out and painted over spots of rust that were appearing on the body of my truck to help extend the life of my truck body.

7.  Alvah's mental health doctor is opening her own practice.  I filled out the release of information form and dropped it off at her current office so we can move Alvah over to her new practice.  We did this errand and combined it with a bunch of others that we were doing to conserve gas consumption.

8.  My husband took down an old and not ideal light fixture in our garage and put up one given to him by a friend of ours.  Once we get a few more light bulbs for it, it will definitely light up the darkest corner of our garage very well.  It already lights it up way better than the old light fixture did.

9.  Carrs had 2 lb containers of strawberries on sale for 5.00 a piece on 5.00 Friday a few weeks ago.  I have been trying to pick up frozen fruit since fresh has been expensive and hard to find, but when I saw that sale I went on Friday to see if we could find some strawberries for cheap.  They had actually a good amount in stock, so I picked up 6 lbs of strawberries.  I then sliced and froze most of them on cookie sheets in our nice new big den freezer and then I packed them up and vacuum sealed the strawberries to use later on.  I was able to put up probably about 5  lbs of strawberries (after taking into account the parts I had to cut off the strawberries and the fact that my daughter ate some fresh as well) for nearly the same price as buying a 2 lb bag of frozen strawberries would have cost me.

Speaking of vacuum sealing, I have started making a real effort to vacuum seal meat, fruits and vegetables as I buy them to help to further protect them from freezer burn.  Food is becoming even more of an investment than it used to be, so I want to make sure to protect that investment anyway I can.

10.  A few things from readers.  One:  I got a tip about canning lids from a reader in case you can't find them in your local stores.  She said that if you can't find lids locally to try Forjars.com.  They have really good canning lids from what I have been reading and you can buy canning jar lids in bulk (no associate link or anything, if they even have those, just sharing the link :).

Also, some readers were asking for the price on heating fuel and propane and things around here.  Honestly, I'm not really sure as we are on natural gas here, but the prices are at least double here what they used to be from what I've been hearing and it is already hurting people let alone what it will do to those poor people this winter.  I'm not looking forward to my gas and electric bill this winter.  I can imagine what those on heating fuel are looking forward to :(.  

11.  I started the long, arduous, involved, did I mention LONG, process of filing for guardianship of the son before he turns 18.  There is a mountain, and I am not exaggerating, of paperwork to fill out for the process, so I am starting on it now so we'll be (hopefully) in good shape before the son turns 18.  The paperwork, in itself, is exhausting as there is a lot of stuff to go through.

12.  I worked on condensing and organizing my food storage some more, like putting all of my pasta together and things like that.  It took a bit, taking time here and there, but I think I got a pretty good system of organization down now, which is nice.

13.  I REALLY wanted either croissants or cheese Danishes for Mother's Day.  We didn't have money for anything else, really.  But, we couldn't find anything even close to either of those things at the store when we went shopping.  My husband was able to find a tube of crescent rolls a few weeks later, though, and brought them home.  So, I went online and saw what I could do with those and I found this recipe.  I halved it since I only had one tube of crescent rolls.  The recipe is definitely a keeper!  It was awesome.  I didn't even make the glaze for them and they were perfect!

14.  I went through my spice cabinet and refilled all of the containers that were getting low from my bulk supplies that I put in the lower cabinet next to my stove.  The cloth drawers I put down there are working out fabulously and I am so glad I did what I did.  It makes knowing what you have so much easier as all I have to do is pull out the oils and things I have in the front and then pull out one drawer at a time to find what I need instead of having to bodily climb into the cabinet (short arms I have) to reach everything and put it all out on my kitchen floor until I find what I am looking for.  Much, much easier under the new system :).

15.  I flipped my kitchen table around (I haven't taken a picture yet, but will at some point I'm sure) to make it work better.  I don't know why I waited so many years to try that, but it is working out great so far.  It makes opening the kitchen door much, much easier.

16.  When I was rearranging the den to accommodate the things on the white shelf, I also hauled all the school and office supplies I could upstairs to make home school access easier.  It has already made life easier and we haven't even started school for next year yet *laugh*.  The purple drawers actually have sewing patterns in them, but I still call it a win.  At least everything is in the same room now :).  Please ignore the wad of aluminum foil on the floor in front of them shelf.  The son likes to play with aluminum foil from time to time and threw it right when I took the picture *laugh*.

17.  Speaking of school, we finished up schoolwork for the year and I got all work samples and final grades into the homeschool and everything approved for the last of the year.  I was very relieved to get schoolwork done so that I could start on other work that needed to be done around here.  I did get the curriculum figured out for the daughter for next year and will have to order that after July 1st, which is going to be a bit rough as this is the first year where the majority of her school curriculum is only available via reimbursement so I'm going to have to put money on credit card and then pay it off when reimbursal monies come in.  I also started figuring out, in a general sense, what things I want to work on with Alvah for next year.

18,  I sewed a dresser topper for my son's room (he tends to put things wherever, so the more protections the furniture has from things like cups with ice in them, the better), mended a few shirts and put new buttons on one shirt for my husband in just the last week.  I used only materials I had already to do the projects.

19.  I went out yesterday and cut off the seeds pods that were already appearing on my rhubarb plant in the hopes that it would grow better.  I harvested some rhubarb (it was late in growing this year, along with everything else) and some chives while I was outside, cleaned and cut them up and put them in the freezer to flash freeze.  I'll take them out today and vacuum seal at least the rhubarb to use in projects later (I plan to can the rhubarb when the temperatures cool off a bit.  We have been in the 80's for the last week, so the air conditioner is running and the LAST thing I've been wanting to do is can or bake).

And now for a garden update!
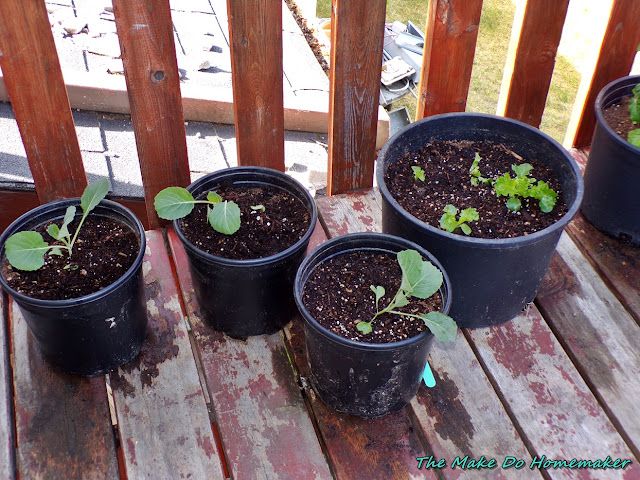
20.  We went out on Memorial Day weekend and picked up plants for the garden for this year.  My husband found some planters I had in the shed that we had moved from our old house and immediately disappeared after we moved here (don't you love it when that happens?) so I was able to plant all of the plants this year in one sitting instead of having to rotate out two plantings of things like swiss chard.  I did, however, have my husband drill some holes in an old Rubbermaid tote we had and I used that as a planter for overflow swiss chard and a few lettuce plants.  I spent a whopping 13.00 on plants this year and that includes some violas, a ground cover/vining flower and a flowering basil plant my daughter chose (I'm not sure if the flowering basil is actually an herb I can use as basil or not as it has small leaves compared to normal basil...I still have to look that one up).    I just didn't have the money to really invest in a ton of plants this year and honestly there wasn't a whole lot available at the nursery in the way of variety when we went.  My plan is just to buy things slowly throughout the summer that I need for canning (like I'm buying frozen fruit when I find that fresh is way too pricey or not available right now) and get things ready for canning that way, or just buy already canned items.  This way I have back ups in place in case they are needed.
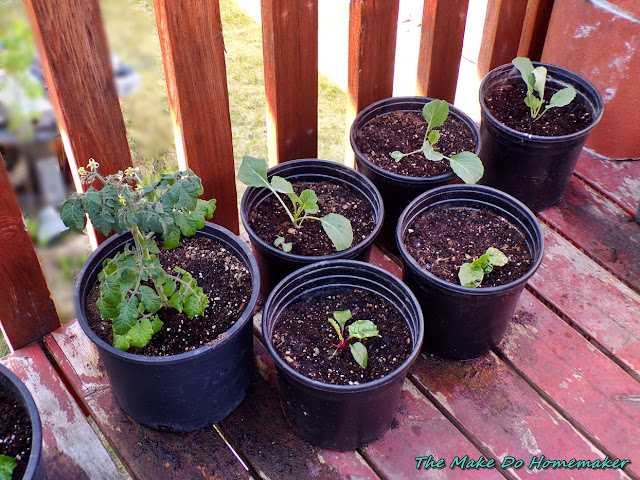
Back to the garden.  I got a six pack of lettuce, a six pack of chard, a six pack of cabbages (these I am praying will make it  and grow well as I want to make a bunch of sauerkraut this year.  I'm also planning to buy in some cabbages to make even more as anything I can do to help shore up our supplies at this point I feel is not wasted).  The seedlings are doing pretty well now that I've hit them with some fertilizer a couple of times and put them in some organic potting mix for container gardening.  Hopefully they will continue to grow well. 

The cat I planted is obviously taking over the container garden (he wouldn't stay out of the shot *laugh*.
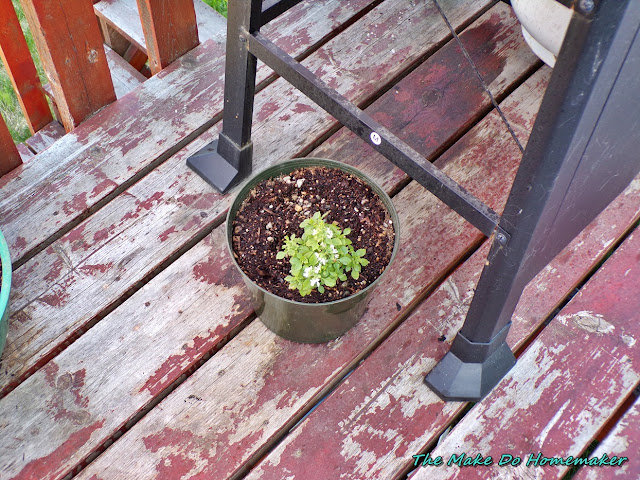
Spring/Summer was late this year and while it would get pretty warm during the day it was still getting pretty darn cold at night up until a week ago, so I didn't get to plant as early as I wanted to.  The seedlings I tried to plant, died, with some help from a son who loves to play with seedlings for some reason and cats who ate them all off after the son opened the mini-greenhouse for them.  Sigh.  One day I will have an outside greenhouse, this I vow.  I got early harvest cabbages, which I'm hoping will work out in my favor with how late Spring was.  I also bought another Red Robin patio tomato plant this year and am hoping it produces well.  I really wanted to get a bunch of those, but they were spendy this year (nearly double what I paid last year) for a developed plant, so I bought a seedling and transplanted it instead.  It is growing pretty well now and has flowers on it in decent numbers, so hopefully we'll get some tomatoes out of it this year.  I just staked it up with the stake that I had left over from last year yesterday, so at least it has grown to be at least a foot high if nothing else *laugh*.
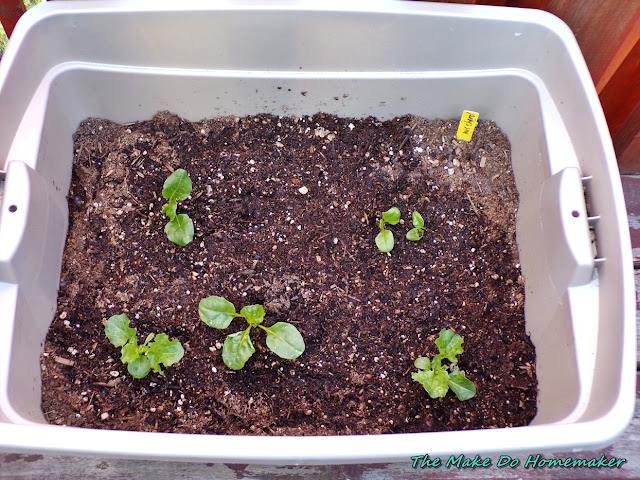
So, that is the garden so far.  I'm not sure if I'm going to get much else planted, honestly.  I keep thinking of trying to plant some other things, but we'll see how far I get and if they even survive if I plant them.  

I am going to work on getting some recipe blog posts up this week and a few other things, so here's hoping life goes well and I can get that done.  In the meantime I hope you all had a very productive May and let's keep chugging along getting stuff done :).